[3.16 UPDATED] - Bergerbrush's Impale Cyclone Champion - League Starter & Beginner Friendly!

"
Morphlings wrote:
Would someone be able to provide me some gear upgrade recommendations? I find that I still get one shot a decent amount when trying to do full juiced content or 100% delirious stuff. I think chaos res (or just not enough life) might be the issue? not sure since there is no death recap.

I have about 6ex as a budget and was looking at some tailwind boots (without elusive since both together is pretty expensive), but not sure if that would help with survivability. I also thought about switching to a rare claw but those also get expensive. :(

Gear:


Thanks for any help!


Right off the bat, I think a new helm will work. I personally never like that helm, as you take extra damage, and need armor or HP to compensate. Mine that I use on cyclone:


Next a ring with Assassin's Mark does wonders!


All easily doable with 6 ex.
Last edited by MarshAllDay on May 30, 2020, 7:22:09 AM
This is my gear, how i can maximize my character, ideas? something wrong?


Can use Touch of Anguish by Wasp Nest? or directly I look for a good rare claw?


Thank you
Last edited by Kalandras on May 31, 2020, 8:57:48 AM
Hey there! This looks to be a very well-written guide, so I'm going to try it. I can't be arsed to read through 140 pages of comments though, so I hope you've kept it updated! Speaking of which ... I've already started making myself some notes, and I noticed some things you might want to include in your guide:

Can be gotten through div cards:
Tabula Rasa (Act 4 Aqueduct)
Belt of the Deceiver (Act 4 Grand Arena)
Le Heup (Act 6 Tidal Island)

Can be upgraded via Prophecies:
Blackheart to Voidheart
Redbeak to Dreadbeak
Karui Ward to Karui Charge
Asenath's Mark to Asenath's Chant
Deidbell to Deidbellow

... if you think any of those items should NOT be upgraded I'd be curious to hear which and why not.
Hey Bergerbrush,

Just wanted to give a big thank you for this guide, it was incredible fun to play it this league, I enjoyed every minute of it. I never was able to clear this much content, to hoard this much currency and to get 36 challenges in a league. I'm still far from a min-maxed character and will likely continue playing and improving this char on standard, but I'm still happy with the shape it's in now.

Thanks for putting this well written guide together and to hook me on this game like I never was before!

why do the leveling trees have the right side of the tree but the final build ignores it and goes up the left side?
"
Bergerbrush wrote:


PLEASE READ THE UPDATE SECTION TO SEE IF I HAVE ADDED ANYTHING SINCE YOU LAST SAW THE BUILD
3.10 UPDATES
Spoiler

Update #4

Added more Min-Max option such as Ryslathas Coil and Influenced Belts/Gloves.
Added Catalysts in Experienced Guide.
Added Clip in Cluster Jewel Section explaining purchases of Cluster Jewels in Beginner Guide.

Will soon add another Clip explaining usage of Cluster Jewels in Beginner Guide.
Will also soon finish build completely by adding some more general information in Beginner Guide and finalize the Gear Section in Beginner Guide.

Update #3

Updated Flasks for this Build to increase DPS without any investment. And also changed to Basalt Flask for better defenses.
Updated Gem section to add Dash/Flame Dash + Second Wind.

Update #2

Fixed various PoB's that was showing some minor things wrong.
Added information regarding juggling Intelligence / Dexterity stats.
Added information regarding -15 Armour (people think this is a must have, when its just a nice QoL)
Added new section "Non-Cluster Jewels Tree" for people who don't wanna play with Cluster Jewels.

Update #1

NEW UPDATE TO THE BUILD GUIDE!

Completely Changed the Build from the Ground up! 3 NEW MAIN SECTIONS ADDED!

"New Players Guide"

"Experienced Player Guide"

"Expert Player Guide"


The "New Players Guide" now contains the Leveling Skill Gems, Skill Trees and Leveling Gear and all the information that you may need.

KEEP IN MIND THOUGH THAT THE SKILL TREE'S IN THE SECTIONS ARE VERY DIFFERENT

THE NEW PLAYER GUIDE SKILL TREE IS MAINLY FOR COMPLETE BEGINNERS AS IT IS A COMPLETELY DIFFERENT SKILL TREE TO MAKE UP FOR THE ANNOYING DEX REQUIREMENTS.

The "Experienced Player Guide" is completely finished and should be looked at for people who are somewhat experienced in this game or already started their characters and started working on a Skill Tree.

EXPERIENCED PLAYER GUIDE HAS 2 DIFFERENT SKILL TREE'S DEPENDING ON UR INVESTMENT LEVEL AND KNOWLEDGE IN POE!

The "Expert Player Guide" currently contains nothing. I will update that soon with TL;DR version of the Build and Min-Max Gear(Like really expensive stuff)


Due to an overwhelming amount of Questions on both my Stream, Discord and in this Forum Thread. I can no longer keep up with everything and can therefor not respond that good anymore to the Forum. If you have an important question to ask me, either DM me or ask me on Stream. I am very sorry for this, I wanna help the best that I can but I am working on other projects as well.

If you need any help or have any Questions feel free to ask me in my Twitch Stream! I stream Fulltime on Twitch and try my best to help out!

https://www.twitch.tv/bergerbrush

Pros and Cons

+ All content Viable
+ Easy to Play, Spin to Win!
+ Instant Life Leech feels super nice
+ Strong single target even with a tighter budget
+ League Starting Viable
+ Handle deep Delirium Mobs well
+ AFK Facetank 80% of the Game
+ In depth Guide & SSF Viable
+ Min-Max to destroy Content
+ Slayer Version for Better Map Clear(Less Single Target DPS)

- Can not Facetank certain Bosses
- Medium Map Clear Speed
- Struggle in no Leech Maps
- Can not do Physical Reflect Maps
- Stat Requirements annoying to get
- Low damage during "Mob's cannot be Taunted" maps


PLEASE READ THIS INFORMATION SPOILER BEFORE LOOKING THROUGH THE GUIDE

Information about this Guide

Spoiler


If you are a NEW player to Path of Exile or it is your first time playing a Melee Character I suggest you look in the "New Players Guide" section. This will contain a detailed guide about everything you need to know From starting in Act 1 to endgame mapping. This version has a different Skill Tree and a Budget Version of the Gear we use.

If you are a EXPERIENCED Path of Exile player or know your way around a Melee Character I suggest you look in the "Experienced Player Guide" This will contain a somewhat detailed guide for this build of how to build this character and a Semi Budget/Semi Expensive Gear section. It also has 2 different Skill Tree's to choose from depending on how much currency you have and how experienced you are.

If you are somewhat of an EXPERT in Path of Exile I suggest you look in the "Expert Player Guide" This will contain the TL;DR version of the build with a MIN-MAX version of the gear and the Skill Tree optimized for high dps and life to really squeeze out the most of this build.

For the people reading the "New Players Guide" and the "Experienced Player Guide" if you at any point feel like you've reached the characters current peak then feel free to go to the next section and look what upgrades you can do for your character.


Videos & Build Showcase
Spoiler


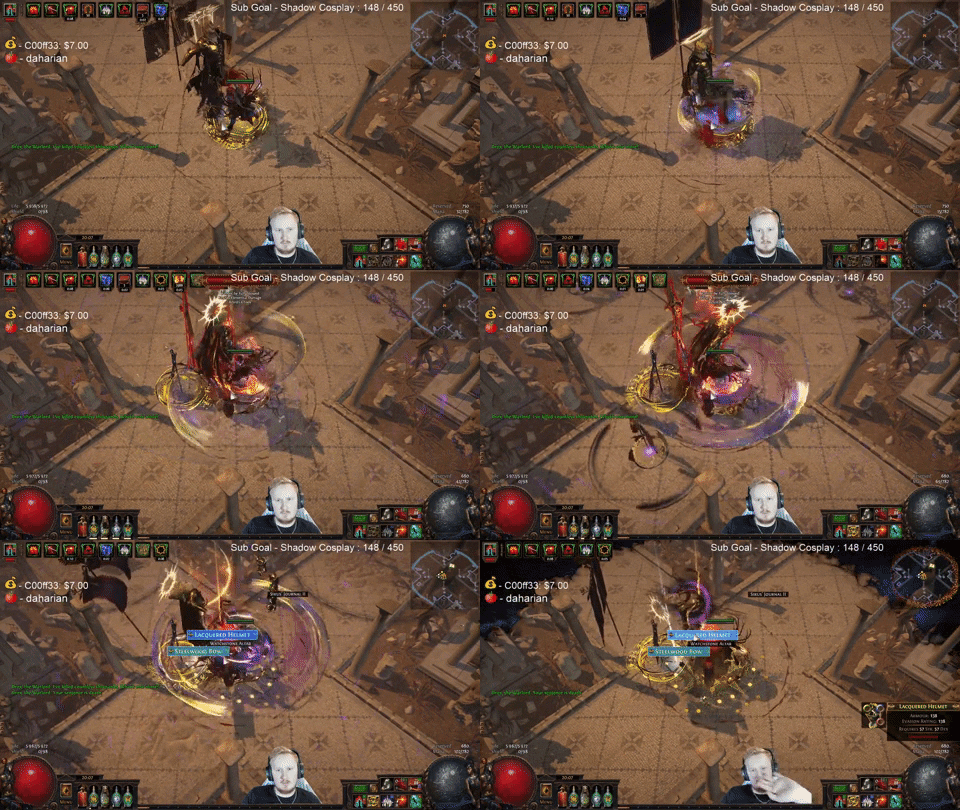
This is me showcasing a Drox Kill in the middle of 3.9(Metamorph) with a 10 Exalt Investment at that point.


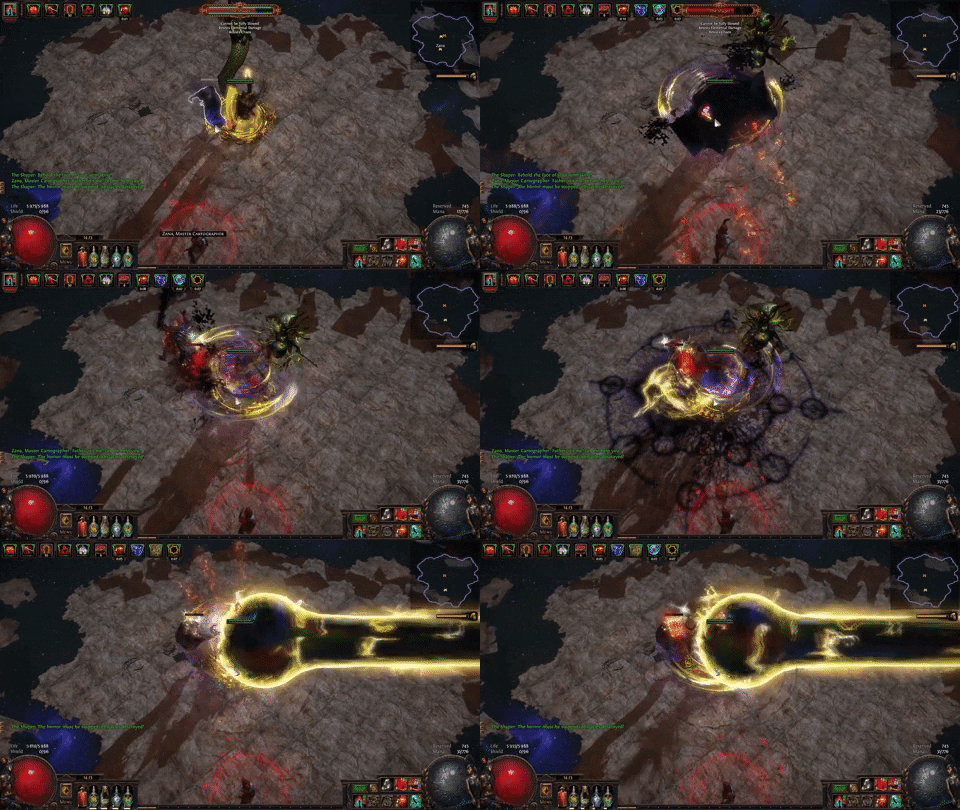
This is me face tanking both the slam and the beam from Shaper. I believe the Slam was lucky dodge but I do believe as well that I can facetank his slam if it does hit. Haven't been hit by it yet though... This was in the middle of 3.9(Metamorph) with a 10 Exalt investment at that point.

20/20 Wave Simulacrum Showcase

Simulacrum

Remember to look at the Update Video for 3.10 to see the changes to the build and using the Cluster Jewels!

Update Video for 3.10 & Cluster Jewel system

Cluster Jewel Video

New How to Craft -15 Armour Video

How to Craft -15 Armour

Build Guide

3.9 Build Guide

League Starting & Leveling Guide Video

League Start & Leveling Guide

Drox Kill in 3.9

3.9 Drox Kill


New Players Guide

Spoiler


Welcome to the New Players Guide of my Facetanking Impale Cyclone Champion Build! I made this version for newer players to understand why we make certain choices and what different mechanics means for this Build. All information necessary to go from Level 1 to reach Endgame will be heavily detailed in this version. Let's start very simple by talking about some general information about the character!

Information

Spoiler

What can I expect from this Build?

First I want to clarify that this build is very easy to make and a good build to start with if you are new to the game, making a new character or its league start. But that does not mean you will completely destroy endgame bosses within a few days of playing. It will require some investments to easily kill most Endgame bosses. And the title says Facetank but that does not mean you can AFK-RIGHT CLICK every boss in the game. 20% of the game still requires any build in the game to move around/dodge and interact with mechanics.

This build heavily relies on the Instant Leech from the Bloodseeker Hellion's Paw that we use in our Offhand. The Bloodseeker has the "Life Leech from Hits with this Weapon is instant" Which means that the 2.8% Life Leech is instantly regained on our character as HP. But what does this mean? It means that for us to be leeching so much HP we MUST BE ATTACKING SOMETHING. If we are not attacking something we are not leeching. So if you are far away from mobs, or they are dashing around the room and doing ranged damage. You can still die!

Some mechanics from certain bosses makes it so that we can not just straight up AFK-Facetank them. BUT most bosses in the game we actually can.

I am very new to the game. Can I easily follow this Guide?

I will do my best to make the New Player Guide as comprehensible as possible. I will go into detail about Leveling, Leveling Skill Trees, Leveling Gem Setup, Ascendancies and Building the character for Endgame. I will try my best to provide videos regarding certain things throughout this Guide as well.


Leveling Guide

Spoiler


Below you will find 4 Sections with explanations regarding what Leveling Items are useful for leveling, what Gems/Skills are good for leveling, Skill Trees to follow during your leveling stages and what Ascendancy Skill Points we take.

Leveling Gear Act 1-10

Spoiler


BODY ARMOR | Tabula Rasa is one of the best leveling items in the game. All the sockets are linked and all the sockets are White. Which means that you can put any Skill Gem in any of the sockets. This makes it easy for us to swap around different Skill/Support Gems and also use a 6-Link for heavy damage while leveling.

If you can not afford or acquire a Tabula Rasa then try to find a 3-Link for the early acts and try finding a 4-Link as early as you can. If you do not understand the Skill Gem/Link system in the game I suggest looking at Engineering Eternity's Beginner video regarding Gems and Sockets.

https://www.youtube.com/watch?v=isrXLCLbm_M


WEAPONS | Here I have listed a few good leveling Weapons for the Acts to use in this build. One very important thing when you level a Melee Character is to keep upgrading your Weapons throughout the Acts. What we mainly look for on any weapon is Physical Damage. You can see at the top of each weapon how much Physical Damage it has, and the higher number the better. It also needs to be said though that some weapons have Attack Speed, Elemental damage and other helpful mods. These are also good to have on your weapons. Later in the Gem Setup Section I will explain about Brutality Support though and how that neglects any Elemental Damage we do when we equip Brutality.

If you can not acquire any of these weapons or other good Unique Weapons I suggest trying to loot Rare Weapons with High Damage.


HELMETS | The three Unique Helmets listed here are all pretty good for leveling. The best one is the first one listed "Goldrim Leather Cap" because of its +% To All Elemental Resistances. This is a defensively great item and helps us against Elemental Damage in the Acts. Specially after our first encounter with Kitava at the end of Act 5. After that encounter Kitava lowers our resistances and makes us more vulnerable to Elemental Damage.

If you can not acquire these Helmets I suggest trying to loot Rare Helmets with Resists and Life.


BOOTS | There isn't really that many great boots for leveling. What you are mainly looking for on a pair of boots during leveling is Movement Speed. I suggest a very generic pair of Unique Boots here that can be used at level 1, gives 20% Movement Speed and also gives us the modifier "Cannot be Frozen" which can be very helpful while leveling.

If you can not acquire these boots I suggest trying to loot Rare Boots with Movement Speed, Life and any Resists.


GLOVES | Here are two pretty good gloves for leveling with. First one can be used at level 1 and generates Frenzy, Endurance and Power Charges (Different charges gives different buffs, all very helpful!)

If you can not acquire these Unique Gloves I suggest trying to loot Rare Gloves with Life, Resists and if you can any form of damage! (Physical Damage to Attacks is a great one)


BELTS | The Meginords is incredibly for early leveling. It gives life, great amount of damage and a bit of Cold Resists. Later on you should try to either pick up a Belt of the Deceiver though as that Belt is incredible for this build, specially early on and as a Budget Version. It a bit of life, all resists and the damage is incredible with Intimidate to nearby enemies. Intimidate causes nearby enemies to take 10% Increased Attack Damage.


RINGS | Blackheart is super nice for early leveling as it gives damage and life. The Praxis Paua ring is absolutely lovely for leveling because it lowers the Mana Cost of our Skills so we don't have to struggle with Mana as much and using Mana Flasks too much. Le Heup of all Ring is extremely good as it gives damage, Attributes to help us use different Gems and then it also gives all resists. It works great for using 1 or 2 maybe paired with a Praxis all the way up to Maps even.

If you can't acquire any of these uniques I suggest trying to loot a Rare Ring with Life, Resists and any form of damage! (Physical Damage to Attacks is incredible)


AMULETS | There isn't much great options for Amulets. I would personally use a Karui Ward at level 5 for its Movement Speed and then swap to a Extractor Mentis at 16 because it gives us Onslaught(20% Attack Speed + 20% Movement Speed) and also gives us Unholy Might(30% Physical Damage as Extra Chaos damage)

If you can't acquire any of these uniques I suggest trying to loot a Rare Amulet with Life, Resists and any form of damage! (Physical Damage to Attacks is incredible)


FLASKS ACT 1-4 | Your Flask setup during the first couple of acts should be LIFE - LIFE - MANA - MANA - QUICKSILVER

Remember to upgrade your flasks through out the acts though! It is very unwise for example to have a Small Life Flask at the end of Act 1.


FLASKS ACT 4-10 | Your flask setup after a couple of acts you can pick up a Onslaught flask instead of a 2nd Mana Flask and keep upgrading your Life/Mana Flasks overall as well!


Skills for Leveling Act 1-10

Spoiler


All these Gems listed here are "Level 1" But you wanna keep leveling your Gems during the acts. Because higher leveled gems adds more damage.

Damage Skills

Level 1 Setup:


Level 4 Setup:


Level 8 Setup:


Once you hit Level 28 you have the choice to either use Bladestorm Setup if you are leveling with Swords. Or you can use the Cyclone Setup already. But I must say that Cyclone doesn't really work too well until around Level 40 when we have our first Ascendancy Skill Points and can use better Gems.

IMPORTANT Leveling with Bladestorm requires only Swords or Axes as your WEAPONS. You can not swap to Claws and still use Bladestorm as your Damage Skill. If you wish to swap to Claws then use the Cyclone Setup instead.

Level 28 Bladestorm Setup 3 Red 1 Green:


Level 28 Bladestorm Setup 2 Red 2 Green:


If you swap over to Cyclone make sure to have #? Skill Tree finished for the Swift Skewering Impale nodes.

Level 40 Cyclone:


Movement Skills


Important to keep in mind is that Leap Slam requires Swords/Axes/Maces for it to work. If you swap over to using Claws at any point. You will need to use Dash or Whirling Blades

Link Leap Slam with Faster Attacks to Leap Slam quicker at the expense of Mana Cost.


Important to keep in mind is that Whirling Blades requires Daggers/Claws/One Handed Swords for it to work.

Link Whirling Blades with Faster Attacks to Whirling Blades quicker at the expense of Mana Cost.

Auras


It is important that you stop leveling Precision at Level 4. We will use a level 4 Precision for our HIGH-ENDGAME setup. To stop Leveling a Gem you right click the Gem on the right side once it is ready to level up instead of Left Clicking as you usually do to level up a Gem.


Flesh and Stone should be linked with Maim. It makes it so when you use Sand Stance you also Maim enemies.

Also when you use Blood and Sand & or Flesh and Stone. You can alternate between Blood and Sand Stance. I suggest Sand Stance for clearing packs of mobs and Blood Stance for Single Target/Bosses.

Other Utility Skills


PRE-ENDGAME 5-Links

5 Link Bladestorm:


5 Link Cyclone:
or swap out Melee Physical for

If you want more AoE/Map Clear. It's a DPS loss but Pulverise makes our Cyclone much bigger which can feel really nice for map clearing.

6-Link with Tabula

Frost Blades Level 1-28:

WRITE HERE - NOT DONE YET

Bladestorm Level 28-68:

WRITE HERE - NOT DONE YET

Cyclone 28-68:

WRITE HERE NOT DONE YET


Skill Tree's for Act 1-10

Spoiler

Act 1 - Level 12
Act 1 Skill Tree

Act 2 - Level 22
Act 2 Skill Tree

For the Bandits Quest in Act 2 I suggest you Save Alira.
Alira gives us:

+20% to Global Critical Strike Multiplier (Which means Damage for our Build)
+15% to all Elemental Resistances (Which means we balance Resists much easier)
5 Mana Regenerated per second (Nothing special but Mana Reg is kinda nice)

If you want to you can also Kill all Bandits, BUT that makes it harder to build the character for endgame because we need more Resists on Gear.

Kill all Bandits gives us:
2 Extra Skill Points (We can use these in the skill tree for more life/damage)

Act 3 - Level 32
Act 3 Skill Tree

Remember to do the First Labyrinth at the end of Act 3 when your character is around level 33~

You want to choose "Master of Metal" with your first Ascendancy Skill Points.

If you do not know what the Labyrinth/Ascendancy system is I direct you to a quick video I made that explains the Labyrinth, Ascendancies and the Trials.

https://www.youtube.com/watch?v=cnF3sGYgcQU&t=

Act 4 - Level 40
Act 4 Skill Tree

Act 5 - Level 45
Act 5 Skill Tree

Act 6 - Level 50
Act 6 Skill Tree

Act 7 - Level 54
Act 7 Skill Tree

Remember to do the Second Labyrinth at the end of Act 7 when your character is around level 55~

You want to choose "Conqueror" with your second Ascendancy Skill Points.

Act 8 - Level 60
Act 8

Act 9 - 64
Act 9

Act 10 - Level 68
Act 10

Remember to do the Third Labyrinth in Act 10 when your character is around level 66~68

Do this preferably before you finish Act 10 Kitava so you don't have to balance Resists before doing your Third Labyrinth!

You want to choose "Worthy Foe" with your third Ascendancy Skill Points.

Finished Skill Tree - 68+ in Maps
Finished Skill Tree

Remember that you are gonna put a considerable amount of Skill Points into Cluster Jewels during this league and will therefor play with this Skill Tree to have 2x Large Cluster Jewel spots.

Look at the "Cluster Jewel" section that can be found after the "Gear" section to figure out what Cluster Jewels you wanna try and use. You don't have to get the best "Combos" or the "Top Tier" ones straight away. Just get decent ones and start building on that!

To equip a Cluster Jewel you drag it into the "Jewel Socket" in the Skill Tree that can be found in the Corners of the Skill Tree.


Ascendancy Choices

Spoiler


First Labyrinth: Master of Metal
Second Labyrinth: Conqueror
Third Labyrinth: Worthy Foe
Fourth Labyrinth: Unstoppable Hero


Building for Endgame - Finished Act 10

Spoiler


Congratulations you made it past Act 10 Kitava! The first thing we need to do is to start working on upgrading our gear to balance our Resists, Life and Damage! It is extremely important that you get enough Resists to be Resist Capped! (75% Cold, Lightning and Fire Resists)

Here is a Video explaining Resistances and How to Prepare for Maps!

Gear

Spoiler


An important thing to learn is how to trade with other players in Path of Exile first of all. Which is a pretty weird trading system. I will link an old video of mine that is a Beginner Tutorial on how to buy items from other players that can help you start acquiring your gear in order to start Mapping properly!

As said right before this, it is important to "cap your resists" to 75 before attempting to do maps. Also try to get a decent amount of life on your gear as well.

Beginner Guide: How to trade Video

If you want to see any Gear right now, go to the Gear Section in the "Experienced Player Guide" section. It works just as fine with this Skill Tree and for this Section. It is just a bit more expensive gear overall. But I haven't had time to update this section yet.


Gem Links

Spoiler


IMPORTANT You want to keep almost all Gems except specific ones at Level 20 and 20% Quality. I will explain in this Gem Section what Gems you want to have at 20% Quality and what gems not to have 20.

Often in Path of Exile you do want most Gems Level 20 and 20% Though.

You always want any gems in your damage setup to be Level 20 and 20% Quality.

If you do not know how to Quality your gems there is a great trick to get level 20% Quality on Gems. You take a Level 20 Gem with 0% Quality and sell the TOGETHER WITH 1 GEMCUTTERS PRISM. The NPC will then trade you back the Gem at Level 1 but with 20% Quality. You then Level up the gem to 20 again and you have a 20/20 Gem.

5-Link


6-Link


Auras #1


Dread Banner you want Level 20/20% and Blood and Sand Level 6. Precision you wanna keep at level 4 only.

Auras #2


You want to keep your Flesh and Stone linked with Maim. You want both of them at level 20, quality doesn't matter.

Herald of Purity you want at level 20 and 20% Quality.

Movement Skills


You want these 3 Gems Linked together. Level or Quality doesn't really matter that much.

4-Link Totem for Extra Damage


If you can try to Pick up a Vaal Ancestral Warchief. The Vaal version of the Skill gem that you can get by Corrupting a Ancestral Warchief Gem or looted in Vaal Side Areas.

You can't quality a gem once its corrupted so just get Vaal Ancestral Warchief to level 20. The other gems in this setup you want to level to 20 and 20% quality.

Cast when Damage Taken Setup


You specifically want to keep Cast when damage Taken at level 2 and Molten Shell at level 11.

Cast when Damage Taken is a very unique Gem that will trigger a linked skill when you take a certain amount of damage. The higher you level up the Skill the higher damage you need to take for it to trigger. We therefor want a pretty low level on it. We also link it with Molten Shell that triggers a Buff that absorb some damage that we take during its active time.

Other Utilities


We activate Blood Rage before we are about to kill packs of mobs. Blood Rage is an active Buff that generates Frenzy Charges (Frenzy Charges gives Damage) It also gives Attack Speed and Life Leech.

Blood Rage will refresh the Buff everytime that we kill a monster. So you don't have to reactivate it that often yourself. But we want to reactivate it during Bossfights to keep the buff up.


Handling Cyclone Mana Cost

Spoiler


Option #1 - Mana Leech
The easiest way to do this for now is to have any amount of "Attack Damage leeched as mana %" on a gear piece or in your skill tree. Once you reach Act9+ and accumulate some DPS it will keep you at full mana as long as you are leeching/attacking.

In order to "Attack Damage leeched as mana%" to be viable we need a decent mana pool to work with, and therefor we need to keep using Herald of Purity instead of Pride. We will change this setup once we get -Mana cost on our Cyclone.

Option #2 - Channelling Skills have -3 to Total Mana Cost
If you are able to we can craft the "Channelling Skills have -3 to Total Mana Cost" on our Rings and Amulet. If you have both rings and the amulet crafted it will completely remove the mana cost for Cyclone and you can start focusing on using Pride if you have a Enlighten Gem for the Pride/Flesh and Stone setup.

Remember though that this is much harder to acquire due to leaving out other viable crafting options on our Jewellery such as Resists, Life and any form of Damage.

Option #3 - Acquiring the -15 Total Mana Cost Armour
Once you actually acquire such an armour you can neglect all the other information given in this section and play the build as it is supposed to be played.


Cluster Jewels

Spoiler


All right you made it to where you wanna implement these so called "Cluster Jewels" into your character! So lets get down to some general information about these Cluster Jewels and how they work!

Spoiler


I first suggest you look at this clip down below to see how to equip Cluster Jewels and how you use your Skill Points in them and such.

I will make a Clip here on how to equip cluster jewels and how to use them etc.

So Cluster Jewels is a new Item introduced in 3.10 and I've been doing my best to import them into this Guide. Basicly what Cluster Jewels does is that we can equip a Jewel into a Cluster Jewel spot that have designated spots in the Skill Tree. Depending on what Cluster Jewel we have and what "modifiers" it has on it, we gain "a new part of a skill tree".

There are some specific Cluster Jewels that we want to use for this build that increase our damage very nicely. I have therefor made a Tier List in the next section where you can see what nodes are useful on these Cluster Jewels.

IMPORTANT You do not need the "BEST JEWELS" possible. I see many people trying to acquire Cluster Jewels such as "Wind-Up + Deep Cuts" obviously that is a great Jewel but that's more for the people absolutely Min-Maxing!


Cluster Jewel Tier Lists

Clip showing how to Search for Jewels on Trade Website

These nodes are ranked from 1 being best down to even 9 being the worst in that specific Tier. Remember that a 9 in the higher tier is still better than a 1 in a lower tier though.

If a node from the jewels we use aren't here. Then it's because I didn't find it actually worth it to make any of the Tier Lists. For example Fuel the Fight is nice for attack speed and mana leech. But Damage while leeching is very unstable source of Damage.

Spoiler


S-TIER

Spoiler


Precise Focus


Precise Commander


Deep Cuts - READ "Double Deep Cuts Section Below"


Wind-Up
Wind-Up is especially good for playing only Claws and allows us to generate Power Charges which is a high DPS increase. The thing is though that we only need 1 Wind-Up. If you have 2 Wind-Up nodes in your Jewel Setups then the 2nd one is actually not doing a lot except give a very small amount of DPS. I STRONGLY SUGGEST ONLY 1 WIND-UP IN YOUR GEAR.


Quick and Deadly
Quick and Deadly allows you to play two different Weapon Types if you feel to do so. It allows you to play One-Handed Sword, Axe or Mace instead of the main hand Claw(Wasp Nest)

I do still believe though that playing Claws is the best setup available for this build, specially if you can acquire 1 Wind Up jewel node in your gear for the Power Charges.


Double Deep Cuts
Spoiler


First of all, the reason Deep Cuts is in S-TIER is because in endgame when we accumulate a high amount of DPS, it seems that Deep Cuts scale very well. Therefor in lower levels or with EXTREME BUDGET gear, Deep Cuts is not the best option as it doesn't scale that well. But in the absolute endgame with better gear it scales very well and is the 2nd best node behind Precise Focus.

NOW HERE IS A LITTLE TRICK. I found out that if you play with 2x Deep Cuts you can actually skip all the Swift Skewering and all the nodes leading up to it. Freeing up 5 skill points in your skill tree. Which allows you to put more points into more Cluster Jewels.

Currently these Cluster Jewels are not that hard to acquire yourself and even getting some good ones. And therefor focusing more on Cluster Jewels allows us to reach high amounts of DPS without extreme investments.


A-TIER

Spoiler


Provocateur - Deadly Repartee - Furious Assault - Iron Breaker


B-TIER

Spoiler


Hex Breaker is actually pretty nice, most people don't know that when we open maps with Elemental Weakness, Vulnerability, Enfeeble and Temporal Chains. That we actually lose a lot of DPS or DEFENSES from these different curses. Hex Breaker neglects that by making us Immune to Curses when we Cyclone which is REALLY HELPFUL!

VICIOUS SKEWERING HAS BEEN LOWERED TO D-TIER!


Martial Prowess - Smite the Weak - Basics of Pain - Force Multiplier - Battle-Hardened - Master the Fundamentals - Pressure Point - Quick Getaway - Hex Breaker


C-TIER

Spoiler


Combat Rhythm doesn't give that much DPS, but gives Movement Speed which is really useful for Map Clear Speed.


Combat Rhythm - Insatiable Killer - Enduring Focus - Devastator


D-TIER

Spoiler


Assert Dominance gives the least amount of DPS of all Nodes. But gives a decent amount of AoE for Clear Speed. So if you wanna use it for Clear Speed then go ahead!


Magnifier - Heavy Hitter - Vital Focus - Skullbreaker - Stoic Focus - Unwavering Focus - Vicious Skewering - Assert Dominance


What Jewels can these Nodes be found on?

Spoiler


Large Jewels:

Attack Damage: Deep Cuts - Vicious Skewering - Martial Prowess - Smite the Weak - Devastator - Heavy Hitter

Attack Damage While Dual Wielding: Deep Cuts - Quick and Deadly - Deadly Repartee - Vicious Skewering - Martial Prowess - Smite the Weak - Insatiable Killer - Devastator - Heavy Hitter

Dagger and Claw: Deep Cuts - Wind Up - Vicious Skewering - Martial Prowess - Smite the Weak - Heavy Hitter - Devastator

Physical Damage: Furious Assault - Iron Breaker - Master the Fundamentals - Battle Hardened - Force Multiplier


Medium Jewels:

Area Damage: Magnifier - Assert Dominance

Channeling Skills Damage: Precise Focus - Hex Breaker - Enduring Focus - Vital Focus - Stoic Focus - Unwavering Focus

Critical Chance: Precise Commander - Pressure Point - Basics of Pain - Quick Getaway - Magnifier - Skullbreaker


Pantheon

Spoiler


The Pantheon is unlocked after Act 6 when you start defeating certain bosses in the Acts. It is a little mini "Skill Tree" where you can select 1 Major Skill and 1 Minor Skill. By clicking "Y" in game you can open your Pantheon and select which ones you want. I suggest these different Skills depending on your playstyle.

Major:

Soul of Solaris - for single target/bossing. %Physical Damage Reduction helps to balance out the Abyssus.

Soul of Lunaris - for mapping. Extra clear speed and defenses with %Physical Damage reduction and %Movement Speed.

Minor:

Soul of Gruthkul mainly for the %Physical Damage Reduction.

Otherwise Soul of Shakari for defenses against Chaos Damage and Poison. Very useful for Al-Hezmin maps/bossfight.


Path of Building

Spoiler


Path of Building with Leveling Skill Tree's

https://pastebin.com/1BvxfCLS

Contains Leveling Skill Gem's and all Leveling Skill Tree's


Oh boy this is going to be good
hmm what you think is better for next season https://www.youtube.com/watch?v=OBeb0SCSALg&t=562s or yours i hate this twists . :D
Are you planning on updating the guide (to a 2H version) for 3.11 given the nerfs announced to DW and stun?
"
marnikxs wrote:
Are you planning on updating the guide (to a 2H version) for 3.11 given the nerfs announced to DW and stun?


I came to ask same question as i like this build and wanted to play it a as league starter for Harvest

Report Forum Post

Report Account:

Report Type

Additional Info