


[3.X?] ALL Content! Lv100 Huy's OG Summon Raging Spirits Necromancer Guide - .:The Druid:.
|
https://www.twitch.tv/ihuy Service Thread: https://www.pathofexile.com/forum/view-thread/2575156 💫[3.8 Great League Starter!] Huy Crit Shockwave Staff Cyclone Berserker: The Pepega💫: https://www.pathofexile.com/forum/view-thread/2617717 [3.X] Huy’s OG Summon Raging Spirits Necromancer Guide: The Druid!  Full Shaper Run Full Uber Atziri Run Hi, I’m Huy. I’ve been playing Path of Exile for a while now (since 2013), but this is the first guide I’ve ever written for one of my builds. After numerous requests, I decided to create my very first guide. I get very excited about theory-crafting and both welcome and encourage discussion about this build both in the forums and my discord. Catch me at https://www.twitch.tv/iHuy or in game @iHuy and feel free to ask any questions and/or make suggestions. Thanks! 3.4 Early Notes Hi everyone, There are a lot of interesting options from what I've read of the Patch Notes. I have some ideas involving the new mechanics and items that will be available, but it's still a bit early for me to know how it will work out. I'll definitely let you guys know once things become more clear. Feel free to go wild and experiment. In fact, please do! Let me know how it goes (hopefully with as much concrete details as possible) and share it here. Let's enjoy Delve~ :)
3.3 Incursion League Update
The patch notes did not mention SRS at all xD so there isn't any change at the moment to the build. It should still be viable if you enjoy the playstyle :) For those you don't want to deal with mana issues, The Covenant is a fantastic choice these days~ This allows you to free up a Flask Slot for another defensive (Basalt/Stibnite/Granite/Jade/Rumi's/Kiara's/etc) flask. Your natural life regen + life flasks are more than enough to regen life if you properly invest into them (belt mod, proper flask rolls, gear, tree). If your gear is not to the point to be able to shield charge into packs without dying, you can use ball lightning as a ranged way to proc EE. Play it safe! (ie Don't play like me ;P) Personally, I'll be working on a new build this league :X (hopefully it will work out). The goal is to make another build that can handle all contents in the game (any map mods, bosses, hall of grandmasters, etc). It will be streamed at https://www.twitch.tv/ihuytv Path of Building Links: https://pastebin.com/xYGDCy55 Updated 10.13.2017 I readjusted the tree for more jewel nodes since I was able to craft/find some really sick ones (If you cannot afford crazy jewels, stay with the old tree). https://pastebin.com/HGWR7zKx [Set up for dps vs Guardians/Shaper (per srs), I would normally use a Belly otherwise for normal mapping/leveling safely ^_^. Note these are items I currently own.] 
1.0. Introduction
1.1. Pros & Cons
Pros
Cons
1.2. Playstyle
This build is primarily a high speed clear build, but can be played both as offensively or defensively as the player is comfortable with. The goal is to get a ‘rolling wave’ of SRS by casting a few skulls, using a movement skill, then casting a few more. Over time you will master the ‘feel’ of keeping this wave going, as well as have a better grasp of the aggro range of the skulls and how to best chain them through mobs. You have the option of being in the middle of your skull pack, with good fortify uptime due to Increased Duration, or alternatively, you can corner-cast for more defensive play by letting your skulls around a corner at more difficult mobs. This versatility is the cornerstone to the build’s success and survivability.
1.3. Grouping
By running three auras and keeping Necromancer Ascendancy, without changing any gear or gems, you already supply a party with modest buffs. Haste and Hatred are always crowd pleasers. Clarity is useful on low regen maps. Skulls will spread and target stragglers automatically thus the group can stay together.
1.4. Origins
At the beginning of Harbinger, I wanted to do everything in the game at a modest budget. This meant that I needed a build to tackle leveling, all map mods/combination, magic find, bosses, uber bosses, and even the infamous Hall of the Grandmasters. I’m proud to say that this build can accomplish all of that with small adjustments. I have a stash tab called “Test” that I use to swap in different items depending on the situation all the time. It is super handy and I love that aspect about the build. Even in my inventory, I carry around the usual “Strongbox Rolling” pack and a few pieces of gear/gems that I swap in depending on the situation. It even allows for different setups while solo and grouping (with a proper support). With the proper adjustments, all content in the game can be done (even deathless if you are practiced and well geared)! 
2.0. Skill Trees, Ascendancy, and Leveling
Finished Tree from Harbinger - 112 points There are several possible paths to go for when aiming for 100. In addition, while at max level, there’s quite a bit of flexibility and after level 90, it is recommended to tailor the remaining 10 points towards your own playstyle/needs.
2.1. Ascendancy - Necromancer
The choice of ascendancy class is a simple one. The Necromancer. Ascendancy Skills While leveling, pick the Ascendancy skills in the following order:
Note: Some might wanna take a minor for minion dmg but the chaos resist is needed, plus the poison clouds are strong especially and scale (mine does about 8k dps). The clouds also appear when the SRS runs out of duration, or if more SRS are summoned. This means spamming SRS will cause the caustic clouds to appear in addition to those that would normally form on minion death.
2.2. Leveling & Skill Tree Options
Recommended Leveling Tree
While there are any number of variations to progress through the levelling tree, this is the recommended progression which balances survival and damage for ease of leveling. Following this path is great for league start when gear is sparse, or for SSF. However, do what is best for you and is best suited for your play style. Imgur Album - Step by Step Progression through Tree. Taking Elemental Equilibrium (EE) or Mind over Matter (MoM) early on in the tree should be for those experienced with their mechanics. EE requires Orb of Storms + Shield Charge with x to x lightning damage on a ring or amulet. MoM requires careful mana management, which if taken early on can be beneficial for survival, but one should be prepared to invest in Mana Regen rings/amulets and prioritize mana flask upgrades while levelling in order to combat the ‘lock-downs’ that can occur when sustaining heavy damage. If you feel you can manage these two mechanics early on, or are a veteran to PoE and have used them in other builds, then you will want to acquire both EE and MoM as you pass by them on your way down to minion damage and the life wheel.
Recommended Uniques
There’s a variety of useful uniques beyond the Tabula Rasa that this build can benefit from while leveling. However, none of these are required. These will only facilitate a smoother leveling process. Each unique is linked to the corresponding Wiki article.
Helmets
If SSF or if you don’t prefer to use a Unique Helm, then a 4-Linked +1 to level of socketed minion helmet is great for leveling.
Gloves
Boots
Weapons
If Leaguestart, or SSF and you do not have access to a Tabula/Lifesprig/Reverberation, do not forget that you can craft a nice starter +1 Fire Gem Wand or Sceptre. You get one by vendoring a Magic Weapon, Orb of Alteration and a Ruby Ring. Don’t forget to Augment a second stat to it!
Shields
Amulets
Rings
Body Armour
Gem Setups for Leveling
As soon as you can afford to, when starting a league, you should buy two wands or wand/shield with three blue sockets each to use in your swapped weapons. Then, when you can afford to, buy 6 more SRS Gems and seat all six in your swapped gear. This will come in handy later, as you can then trade them in with a gemcutter’s prism to get a 20% Quality SRS. Level these again and then corrupt them for your 21/20% SRS. If you’re lucky with corruptions, your time will pay off in several exalts. Alternatively, once levelled, Haku will sell a %Quality to Gems weapon. If you can afford your Empower early on or find one make sure you seat it in Haku’s weapon as it will just help it level faster.
SRS Links
Leveling 3 Link SRS - BRB
4 Link SRS - BRBB or BRBR
5 Link SRS - BBBRR or BBBRG
6 Link SRS - RRRBBB or BBBRRG
Other Gear Links
Feel free to use zombies/spectres/skellies as you level to fill in gem slots until you can get the gems you’ll need for end game set-up. You’ll want to support these with Minion Life and Minion Damage The following is a list of the other gems used in the build, their minimum equip level. Note that some of these will be offered as quest rewards. Others, you will have to buy from other players or wait until you can purchase them from Siosa in the Library (Act 3) or Lily in Lion’s Eye Watch (Act 6). Shield Charge Link: Shield Charge - 10 Fortify Support - 31 Faster Attacks Support - 18 Cast When Damage Taken Link: CWDT Support - 38 (Note: Do not level this gem, keep at L1.) Immortal Call - 34 (Note: Level this gem to L3 only.) Enfeeble - 24 (Note: Level this gem to L5 only.) Increased Duration Support - 31 Vaal Spell Link: Vaal Haste - 24 Increased Duration Support - 31 Vaal Lightning Trap - 12 Flesh Offering Link: Orb of Storms - 4 Flesh Offering - 12 Faster Casting Support - 18 Desecrate - 16 Auras: Clarity - 10 Hatred - 24 Generosity Support - 31 Summon Stone Golem - 34 *Remember to only link Generosity to Hatred.
2.3. Pantheons
Major:
Minor:
2.4. Bandits
Kill ALL of the Bandits to receive 2 Passive Skill Points from Eramir.
2.5. Build Keystones and Explanations
Mind Over Matter Mind over Matter was nerfed in 3.1 in the following ways:
This doesn’t mean that this is no longer a desirable keystone for the build, but it has to be accommodated for in a few different ways. There are a variety of % Total Mana nodes within reach when moving through the passive tree. Going for the jewel socket northwest of the Scion starting point has %Mana nodes. Another place is to pick up the Deep Thoughts noteable passive, next to the Cruel Preparation life nodes already in the build. Further troubleshooting for mana problems is located below in the FAQ. Elemental Equilibrium Elemental Equilibrium is an amazing damage boost for this build. SRS uses physical and fire damage, and we add additional cold damage through Hatred. This leaves lightning as the remaining element to proc the effect, and this build includes three different ways to do so. EE lasts 5 seconds at a time and can be refreshed as needed to keep 100% uptime. You will know when EE has been properly applied to an enemy by the Pink/Purple/Blueish spell affect at their feet, which is seen below:  You will also see a written confirmation that EE is both active and attuned to the correct element when you see “Vulnerable to Fire, Vulnerable to Cold” listed on the mob’s affixes. With trash this may be hard to see, but with rares and bosses, you should be able to see this on mouseover targeting. It will look like this:  The first way we apply EE is through Orb of Storms, which can be taken very early on in the levelling process, allowing players to start dealing tremendous amounts of damage early on. Orb of Storms is a Cast-at-Player lightning skill, which leaves an area of lightning damage which will continually apply both EE and Shock to mobs within its effect. The second is through Shield Charge, which takes advantage of the ‘Adds x to x lightning damage on Attacks’ affix found on jewelry, or which can be enchanted on jewelry by Elreon when he reaches level 6. Shield Charge will deal Area of Effect damage at the end animation of the charge in a circle in front of the player. This AoE damage will apply EE to any mob affected by the AoE damage it causes, therefore allowing you to blanket a tightly packed mob group with EE all at once. The third is through Vaal Lightning Trap, which applies EE when the trap is triggered. It should be noted that Vaal Lightning Trap will NOT refresh EE in the same way Orb of Storm Does. Vaal Lightning trap does not cause any further damage after being triggered, instead leaving shocking ground which debuffs the mobs affected by it. Necromantic Aegis Necromantic Aegis is the third and final keystone passive skill this build utilizes. It removes all bonuses provided by modifiers on the equipped shield and applies those modifiers to the player’s minions instead. This includes implicit modifiers such as armor rating, chance to block. In the case of Lycosidae, the ‘Hits Cannot Be Evaded’ passes directly to minions, thus negating any accuracy requirement whatsoever. In Path of Building this was shown to be an absolutely astronomical increase to DPS, far more than any other shield available, including Victario’s Charity. There are some notes in the gearing section with what to use/equip in the time before you can acquire a Lycosidae. Service Thread: https://www.pathofexile.com/forum/view-thread/2575156 New Guide: https://www.pathofexile.com/forum/view-thread/2617717 Catch me on https://www.twitch.tv/ihuy Last edited by iHuy#7050 on Dec 25, 2019, 4:53:39 AM Last bumped on Dec 7, 2018, 3:20:37 AM
| |

3.0. Gear, Gems, Flasks and Jewels
3.1. Recommended Uniques
This build is set up around certain uniques. This section will detail each unique and offer a brief explanation about the item, how it works in conjunction with the build, and offer ways to try and acquire the item.
Belly of the Beast
This body armor is the cornerstone to survivability. The huge percentage to maximum life, when combined with jewels makes it so that this build can reach 7k health and beyond. It is also uniquely synergistic with the Blood of the Karui health flask, the Profane Chemistry notable passive, and the Soul of Ryslatha minor god from the Pantheon. While other body armors may offer higher damage potential, Belly is a staple for the build and should be acquired as soon as possible. There are currently multiple ways to obtain a Belly:
Lycosidae
This shield is the cornerstone to damage. By removing the accuracy requirement for SRS via Necromantic Aegis, this shield provides the highest damage possible over any other shield in the game. Unfortunately this shield, due to its implicit, was widely popular in a number of builds beyond this one, and in 3.1 GGG nerfed the drop rate by a substantial amount. There are currently only two ways to obtain Lycosidae:
The Scourge
This weapon is another cornerstone to damage. As long as you proc it correctly, by shield charging (and hitting something) at least once every four seconds, you gain a massive 70% minion damage. This weapon also grants both you and your minions attack speed (10-15%) which is certainly nice. After the 3.0 nerf to double dipping, The Scourge became the clear winner in choice of weapon. Remember to put your shield charge set up in the claw, as this will grant the spectral wolves both fortify and faster attacks. The wolves can only be risen from you, yourself, killing an enemy, and not minion damage. Displaying enemy health bars and shield charging lower-life mobs aids in this, but should not take precedence over keeping your SRS, EE and Fortify up. Rampage damage, from Bisco’s Leash, can also proc the wolves as well. There is currently only one way to obtain The Scourge:
Grip of the Council
These gloves are best in slot for damage, due to the fact that they are in essence, a mini-hatred buff. By equipping these, your minions deal an additional 20% damage as cold. Unlike some uniques, they also offer a balance of other stats, including modest life, cold resist, and some strength. While these can be very expensive at the start of a league, they quickly fall in price and are easily obtainable within a few weeks for more frugal players. There is currently only one way to obtain Grip of the Council:
Blood of the Karui
This potion is extremely powerful when combined with Belly, Ryslatha’s Pantheon, and passive tree nodes. It has the ability, when at low life, to heal you 8410hp over 1.67 seconds. This provides a tremendous amount of survivability, plus the instant heal to full life at the completion of flask effect is quite nice. This item was exclusive to the Domination and Nemesis leagues. There are currently multiple ways to obtain Blood of the Karui:
Lavianga’s Spirit
When used effectively, Lavianga’s Spirit is an excellent flask to have in the lineup. It has such utility beyond being ‘just a mana flask’ which will be further detailed in the FAQ. Using Lavianga’s will take a little time and practice but is well worth the investment. To properly utilize Lavianga’s in the build requires some counter-intuitive thinking when selecting which one to purchase. Lavianga’s has a range for the amount of mana recovered, from 30%-50%. You will want to find/purchase one with only 30% recovery rate. In addition, DO NOT add quality to the flask from Glassblower’s Baubles, as that would increase the amount of mana restored. Additionally, make sure you do not have any items with Mana Regeneration % once you have this flask, as it will further subtract from the item’s on use effect by filling up your mana pool that much faster. Cast Flesh Offering, then spam SRS until you are low, then use Lavianga’s when you bottom out on mana and keep summoning through the effect. Likewise, Lavianga’s, when paired with a higher Mana pool from taking passives, can almost be a defensive cooldown when used when sustaining light, but prolonged damage such as burning/desecrated ground. This item was exclusive to the Domination and Nemesis leagues. There are currently multiple ways to obtain Lavianga’s Spirit:
3.2. End-Game Gem Setup
Chestpiece:
Helm:
Gloves:
Boots:
Main Hand:
Shield:
Unset Ring:
3.3. Flasks
The following is the ideal setup for all content, but for bosses or farming, the Silver and Quicksilver flasks can be changed to whatever suits your needs. The Chemist’s prefix is highly recommended due to its interaction with Arcane Chemistry's 15% Reduced Flask Charges Used Modifier, allowing you to hit breakpoints that allow 1-2 extra uses of each flasks (especially when coupled with a >19% Reduced Flask Charges Used Belt). Prior to obtaining Blood of the Karui and Lavianga’s Spirit, you can use a Catalyzed Divine Life Flask, and a Catalyzed/Saturated Sanctified Mana flask, respectively. Suffixes can be whatever suits your needs or whatever you happen to roll. If you’re rolling spare utility flasks, or specializing certain flasks for certain fights, remember to always roll the Chemist’s prefix!
3.4. Jewels
Original Jewels
Cobalt Jewels should be your focus when trying to find/craft jewels for your passive tree, as they are the only jewel type that can roll with the ‘Minions deal x% Increased Damage’ affix. Your priorities for stats on jewels should be:
Here are some sample jewels from Harbinger: There are a few ways to roll these jewels yourself. Both the Life % and Minion Damage % are prefixes and will require a lucky regal in order to have both on the same jewel. Cast speed, attack speed and resistances are all suffixes. The Life % roll is difficult to obtain on a cobalt jewel, so it is recommended to have it on the jewel, and to regal/exalt the minion damage.
Abyss Jewels
Abyss Jewels bring new possibilities to the table as far as Passive tree jewels, and as far as belts go, its a no brainer to use a Stygian Vise over a Leather Belt, considering a Abyss Jewel can have up to +50 Life on them, which more than makes up for the implicit life lost by not using a Leather Belt. Your priorities for stats on Abyss Jewels should be:
Here are some sample Abyss Jewels: For the Ghastly Jewels, both maximum life and minion physical damage share the prefix slot. The minion damage on minion skill is a suffix, along with resistances, cast/attack speed. For the prefix, prioritize which stat is higher before adding the regal. It may not be worth regaling a low life roll, or a low phys roll, so check your prefix tiers accordingly. 
4.0. Gear Swaps and Alternatives
Gear in 3.0 Harbinger League:
Spoiler
Gear in 3.1 Abyss League:
Spoiler
4.1. Normal Mapping Swaps
During normal mapping, there’s two common swaps. Belts: Remember with Bisco’s Leash, you need not wear it the entire time. You can equip it, kill one thing, then switch back to your other belt and continue to chain rampage kills. A Leather Belt/Stygian Vise with >19% Reduced Flask Charges Used Belt is great for Bosses. Gems: Use these for clearing trash. Switch back to Elemental Focus and Elemental Damage with Attacks for Bosses. (Any other swaps are likely covered in the other sections below)
4.2. Magic Find Swaps
Not that any of these are new ideas, but these are the MF items most easily integrated into the build. Swap Minion Speed for Item Rarity, especially if you have rings with the crafted speed %. Bisco’s is of course, much more expensive now in 3.1.
4.3. Hall of the Grand Masters
For the most part, this build does great in Hall of the Grand Masters, with one caveat. There are a few ‘Blocker’ exiles mixed in, and these can present a problem for the build. ‘Blockers’ refer to full aegis/regen/immortal block builds, which means that they can sustain their eHP when they get hit by quick attacks. Fast-hitting SRS will not be able to kill them. In this case, you simply swap in the Scorching Ray Setup to melt them down (since it does not ‘hit’), then switch back to SRS. The easiest way to accomplish this is to have a spare chestpiece so swapping can be done quickly, as the gems do differ and you may not be able to swap so many so quickly without dying. Scorching Ray Links for HotGM: Scorching Ray + Controlled Destruction + Elemental Focus + Empower + Burning Damage + Swift Affliction
4.4. Maximum Damage
After hitting lv100, since there's nothing to lose, I've been pushing the damage potential and throw in more magic find. This is what I'm currently experimenting with. I'd recommend to stick with the original setup for most people but for those who are at super end-game, just wanted to give you some further options to consider!
4.5 Shaped/Elder Items
With the beginning of Abyss league, we saw the beginning of the War for the Atlas, which introduced new Shaper and Elder bases to the core game. This really changed things up for a lot of builds, having explicits generally reserved for corruptions/uniques suddenly appearing on rares! It was a very exciting time, and a lot of people had some great ideas on the forums. That being said, spending some time on PoE Affix can help you learn what is available out there. The one that makes the most sense, is of course picking up an shaper amulet with ‘Grants Level 22 Haste’ on it. Any Shaper amulet ilvl 68 and above can roll this suffix, and it obviously frees us from having to use an unset ring! Here’s Brittleknee’s amulet from Abyss League: Towards the end of Abyss Brittleknee was trying to craft an Elder Helmet with Loathing Essences to craft a sweet, sweet combination of both 20% to Maximum Mana, with a 5% Reduced Mana Reserve. She never hit the jackpot, but she did make this little guy: There are some pretty neat combinations out there that allow for more flexibility with the build, which has always been and remains, the cornerstone of why it is both popular and successful. 
5.0. Crafting and Early Gearing
If there is one thing to learn early on, is that essence crafting is both very useful, and can be profitable. While not 100% necessary, crafting your Rings, Amulet, and Helmet can result in huge quality of life improvements when leveling, mapping and killing bosses. The main Essence you will use will be Essence of Fear. This is used for multiple items. The other is Essence of Loathing, which can be used to craft a helm with mana reserve reduction. While the added affixes are more powerful when you use higher-level essences, some players may not have the currency available to craft with Deafening Essences. The information in this section works regardless of what level essence you use, but it is generally recommended to at least craft with Screaming Essences as they are a great starting point for both gearing purposes and profiting.
5.1. Tabula Rasa
When playing at the beginning of a league, or playing SSF, getting your hands on a Tabula early on makes all the difference. Tabs can go for quite a bit of currency in the first week of a new league, and acquiring the currency to buy one outright can be daunting unless you’re familiar with early league markets and trading. The good news is that Tab is 100% farmable, and will cost you nothing but time. While levelling, you can farm The Aqueduct (The First Area of Act 4) or The Blood Aqueduct (The First Area of Act 9) for Humility Divination Cards. A set of nine cards can be exchanged for a Tab. With some time, and some effort, you can acquire your own Tab, and wear it into early to mid mapping. It’s time well invested.
5.2. Crafting a Weapon
If you have a Tabula or 6L, unique weapons like Reverberation Rod and Nycta’s Lantern are no longer useful. A Severed in Sleep at the beginning of a league or in SSF isn’t exactly budget-friendly/acquirable. Brightbeak, while still a solid option before obtaining The Scourge, doesn’t offer any direct damage, though it is awfully fun to zoom around with.. However, using a Screaming Essence of Fear on a weapon will provide a nice 19-22% damage for your SRS. Higher tier essences provide a higher percent minion damage. Claws are a nice choice to craft, since the DPS of the weapon does not affect SRS damage, and Claws can often roll with helpful affixes such as Dexterity, Mana Regeneration, and Resists. An example is:
5.3. Crafting Jewelry
Using a Essence of Fear on a ring or amulet will result in a minion movement speed affix. This is a huge quality of life improvement and works several ways synergistically with the build. It first helps by allowing your minions to chain between packs of mobs more easily, as this seems to lengthen their aggro radius since they can cover more distance. This contributes to the ‘rolling wave’ playstyle by limiting your need to resummon once you arrive at a new pack, allowing you to supplement your existing SRS as you go, rather than having to rebuild your SRS between packs. Furthermore, since this is a all-in-one build, faster minion speed means faster farming. It also means faster arrival time for your SRS to bosses which change positions during a fight, resulting in a higher DPS uptime. Ideally, you’ll want high life (70+), a resist or two, and maybe a helpful stat such a Dexterity for a ring or amulet to be ‘good.’ But there are plenty of other combinations of stats which can also be useful, such as Mana Regen, + Mana, or even Rarity. A Screaming Essence of Fear will net you 19-22% minion movement speed per jewelry item. Some examples are:
5.4. Crafting a Helmet
While crafting a helmet with an Essence of Loathing is not remotely required, freeing up some of your mana from reserve due to the recent nerfs to MoM can provide some wiggle room in talents, allowing you to skip some Total Mana % nodes in lieu of damage, or simply provide a larger mana pool in which to cast SRS and take hits. Screaming Essence of Loathing results in a 3% mana reserve reduction, and scales up to Deafening, which provides 5% mana reserve reduction. Craft with what you can afford. A bone helmet with this essence can be an excellent starting helmet until the helmet enchant from Uber Labs can be acquired. Some examples are:
5.5. Pre-Lycosidae Options
With the price hike of Lycosidae, there are a few ways to combat some of the issues that arise from not having the powerful ‘Hits cannot be evaded’ affix granted to SRS via Necromantic Aegis. One option is to delay the acquisition of Necromantic Aegis, instead finding a nice +Life and +Resist shield for yourself, and using additional accuracy in your SRS Links. Another option is to take Necromantic Aegis, and use a Evasion-based shield, as these can roll with fairly high +Accuracy Rolls to help. This in conjunction with Additional Accuracy might provide a substantial hit chance for your minions. Furthermore, if you take Necromantic Aegis, a Victario’s Charity is a great shield to use in the meantime, providing charges for your minions which will increase their damage. However, you will need to use Additional Accuracy in your link setup. Service Thread: https://www.pathofexile.com/forum/view-thread/2575156 New Guide: https://www.pathofexile.com/forum/view-thread/2617717 Catch me on https://www.twitch.tv/ihuy Last edited by iHuy#7050 on Mar 6, 2018, 8:36:09 PM
| |

6.0. Frequently Asked Questions
6.1. Frequently Asked Questions
Why Can’t I run all three auras?
You might have put a support gem by accident on one or more of your auras :)
Why are you not using Baron?
It's solid as a leveling helmet but lacks the life and resists that I wanted for flexibility. I prefer 109% all res (for elemental weakness). A rare helmet with the enchant I want (21% attack speed with flesh offering) and good life/resists is much easier obtain than a baron. Getting 600+ strength on gear sacrifices a lot of suffixes for minion speed and resistance as well (also requiring perfect items). ATM, it gives me 5.5% (at 326 strength) more dmg on my srs at the cost of not maxing out resist and 248hp.
Why are you not using a Bone Helmet?
Bone Helmets are great as transitioning items while you are leveling/reaching end game. In the end though, the flesh offering enchant is simply TOO good, as it serves 2 functions: 1. Your minions gains a bit more damage with 21% attack speed extra vs even perfect 40% minion dmg roll (at least with my current setup, about ~1k increased damage on srs :D). 2. Because we have Mistress of Sacrifice, we also gain the 21% attack speed for shield charge to super fast.
Why are you not using United in Dream/Severed in Sleep?
They're fine as weapons but the Scourge adds more damage in the end (as long as you proc it). In my Path of Building, I lose about 11.8% damage if I switch to United in Dream (esp after 3.0 poison/double dip nerf).
Why are you using MoM if most of your mana is reserved?
The nodes behind Mind Over Matter, esp Inspiration, let us have even a lv21 Clarity for free and provides a nice buffer. All mana issues are solved by Lavianga's Spirit and/or vaal clarity, even in no regen maps. MoM gives even more flexibility when paired with supports or anyone that runs haste/hatred. Allow the auras to be turned off for more eHP. Even when solo it's still nice to have that extra source of mana regen in addition to the life.
How do you sustain life?
So a little math on how OP Blood of the Karui is. . . with the nodes + Belly, a normal Blood of the Karui use heals you 5256 hp over 1.67 seconds, then insta full too if u are still missing hp at the end of that duration. If you pop it while u are at low life (via Ryslatha pantheon upgrade), it heals you 8410 life over 1.67 seconds (+ insta full hp at end of duration ofc). oh, you also have the seething flask too which you can use at the same time, and heals you for 2350 instantly on low life (1469 regular). With the the >19% reduced flask charges used rare belt (this is why i changed belt on Shaper) + the reduced flask node on tree, you get to use seething divine flask from 3->5(!) times, and Blood of Karui from 2->3 times, not to mention other flask a bunch more too :D
Why are you not using a +3 Staff?
I tried it but it wasn't my style. I want to use shield charge, and with this set up, even with a tabula, you end up doing more damage than a +3 staff with Lycosidae and Scourge.
6.2. Troubleshooting Common Issues
Mana Problems
With the nerf to MoM, this is probably one of the most frequent questions to come up in 3.1. In 3.0, even after reserves, you would still gain an addition 600-800 eHP from MoM. In 3.1, without any other Mana % nodes aside from MoM and the ones behind it, and some of those built into the tree already, you will start off with roughly 200 mana off reserve. This can be very uncomfortable if you do not have much mana regeneration, leading to difficulty capping SRS, as well as leading to deadly ‘pigeon hole’ moments of being ignited, poisoned, or bled, where your mana is being leeched off faster than it regenerates, and suddenly, you cannot shield charge out of danger. This problem can be solved a few different ways.
A sample tree which sacrifices minor damage for mana ‘safety’ would look like this. With a 5% Loathing helmet in addition to this talent tree, you will end up with roughly 700-900 mana off of reserve, which is a nice chunk of eHP. In the end, how you choose the solve this problem comes down to comfort, playstyle and build goals. Choose what works best for you!
Survivability
With the ability to exceed 7.8k eHP fully geared, this build has the potential to take some hits. While being somewhat ‘tanky’ you should never put yourself directly in harm’s way. This build is meant to live through spike damage and rapidly replenish lost life through our life flasks. There are a few things to remember when playing to maximize your survivability:
Affording End-Game Gear
Here is Brittleknee’s custom loot filter which will show chancing bases for Lycosidae, Belly of the Beast, and Bisco’s Amulet. These items show up pink and make a very soft sound. Note: It is based on Neversink’s Strict filter and may not be the best choice when starting a league as it will not show you all rares. There have been a lot of questions on the forum to the tune of ‘Where do you get off calling this build ‘Budget Viable’? Yes, a lot of the items cost quite a bit of currency, but there are multiple work-arounds which have been discussed at length in the gearing and crafting sections. Will you be able to down Shaper in all Rares? No, of course not. You can, however, reliably start content and farm Red-Tier maps in mostly rares, certainly if you follow some of the crafting recommendations above. Up to T14 is viable with just a 5L. The first key to affording end-game gear is to prioritize what you feel like your build lacks, plus a basic understanding of the market. At league start Kalisa’s Grace (comes with Faster Casting built in, allowing you to add an increased duration to the glove links thus prolonging Flesh Offering duration) goes for 1-4 chaos, whereas Grip of the Council starts at about 30-50 chaos, just because they are hard to acquire in the beginning. The market then tanks on the gloves as more people complete the prophecy chain. Knowing this sort of information can really help you make informed decisions in early gearing. Otherwise, aggressively pursue your Chaos Vendor turn-ins, whether you chose to ID or UNID is up to preference. Some do ID turn-ins simply so they don’t miss potentially valuable jewelry rolls. Other prefer to churn out as many chaos as possible, opting for UNID. There is not right or wrong answer here. Flasks are a great place to start making currency. Utility flasks will generally fetch a better price than Divine Life Flasks. The more popular utility flasks are Sulphur, Diamond, Silver, Quicksilver, and Stibnite. Don’t forget to chance Sapphire Flasks for a possible ‘Taste of Hate’ which sell handsomely. Corrupting Unique Jewels that are quest rewards can also potentially have a large payout, depending on what they either get as an implicit, or what they corrupt into. Even when they ‘brick’ down into a rare, there’s the potential that they could roll something more valuable than the 1 Alchemy it had been worth prior. PoE Trade Macro is your best friend. It can really help expedite the selling process by giving you a reference of how much something is worth. You can find it here. A Great Video Guide for it is here. Lastly, convert your Chaos to Exalted Orbs as you can spare them if it is early on in the league. Exalts are an investment, one that matures, just like a savings bond. Given time for the market to mature, you can double your initial chaos investment. 
7.0. Media
7.1. Videos, Gifs, Clips
The Build in Action: Highlights from 3.0. Harbinger League 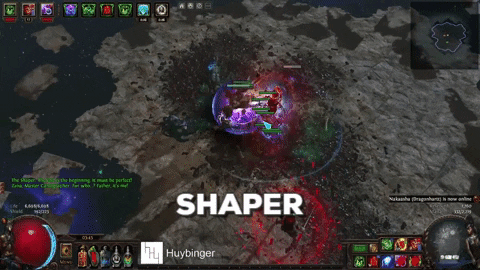 Full Shaper Run: Shaper 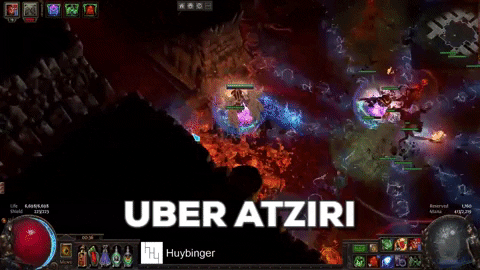 Full Uber Atziri Run: Uber Atziri More videos and clips can be found on Twitch! The Build in Action: Highlights from 3.1 Abyss League (provided by Brittleknee) 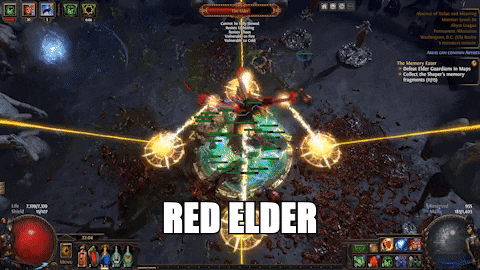 All Breachlords, elder guardians, elder and shaper kills: here.
7.2. Social Media
Twitch! https://www.twitch.tv/iHuyTV Discord! https://discord.gg/0jaIH5z0nPGECG3S Twitter! https://twitter.com/iHuyTV 
8.0. Credits, Updates, Changelog
Credits
HUGE thanks to Brittleknee for taking her time to restructure this guide and rebuild it in a more streamlined and user-friendly manner. I would also like thank all my friends and guildmates. You guys made the game 100x more enjoyable for me. I would have stopped playing a week in or something when I get bored, haha. The new friends and people I met in this league were all super nice and fun to talk to! To the viewers who checked out the stream, thank you! You motivated me write this guide (and make my profile public ;P). Streaming is super hard and I am noob/bad at it, so thanks for bearing with me ><.
Updates
Abyss League Update
3.1 Update Yes, I saw the patch notes :D There's even more potential in 3.1, which I'm excited about! Unfortunately, I'm going to be playing a new build (and will probably write another guide for it if it's legit), but I'll still be updating this build as new information and discoveries are made. Keep the discussion flowing in the comments! The build is still more than viable, and its damage has been buffed in 3.1. This guide has been featured on LiftingNerdBro’s Top 5 Builds for 3.1.
Changelog
[hr] Service Thread: https://www.pathofexile.com/forum/view-thread/2575156 New Guide: https://www.pathofexile.com/forum/view-thread/2617717 Catch me on https://www.twitch.tv/ihuy Last edited by iHuy#7050 on Jun 23, 2018, 3:06:22 AM
| |
|
Nice! I have been waiting for this. GJ and Thanks!
|
|
|
End Result
https://imgur.com/a/HcHHQ :thinking: :thinking: :thinking: :thinking: :thinking: :thinking: :thinking: :thinking: :thinking: :thinking: :thinking: :thinking: :thinking: :thinking: :thinking: :thinking: :thinking: :thinking: :thinking: :thinking: :thinking: :thinking: :thinking: :thinking: :thinking: :thinking: :thinking: :thinking: :thinking: :thinking: :thinking: :thinking: :thinking: :thinking: Edit: I saw it live on stream and it's helped me learn the game since I'm new to it. :D Last edited by Deory#3757 on Sep 6, 2017, 11:58:51 PM
|
|
|
Huy OP
|
|
|
Great build! 10/10 recommended! Very fun!
Fish
|
|
|
Hahaha thanks <3.
Service Thread: https://www.pathofexile.com/forum/view-thread/2575156
New Guide: https://www.pathofexile.com/forum/view-thread/2617717 Catch me on https://www.twitch.tv/ihuy | |
|
Updated a bit with some polish~
Service Thread: https://www.pathofexile.com/forum/view-thread/2575156
New Guide: https://www.pathofexile.com/forum/view-thread/2617717 Catch me on https://www.twitch.tv/ihuy | |
|
Nice build. Beginner frindly and cheap!
|
|


