


[3.11] The Moaning Witch | Evasion based SRS MI Bomber (SSF viable, League Starter)
|
TL;DR (PoB)
Spoiler
PoB 3.13: https://pastebin.com/B4PsmU3c PoB 3.11: https://pastebin.com/9uKDjNhX PoB 3.10: https://pastebin.com/Lgh9GveH Everything is inside. Lab setups, gem setups, items, leveling, min/max (kind of). Quick reference - videos
Spoiler
4-link SSF Delirium league starter: :::: https://www.youtube.com/watch?v=gRYkvO9aiOY 4-link SSF Delirium league starter: :::: https://www.youtube.com/watch?v=9qDH9lngYo4 Final build SSF Standard league (no legacy items): :::: https://www.youtube.com/watch?v=g3qgtgGuBb4 Introduction (Build idea / what is it about? What is our DPS? League Starter? / SSF viable? / HC viable? / Pros, Cons?)
Spoiler
Build idea / what is it about?
Spoiler
I really like playing evasion based characters with evade and dodge as the main defense. I also love Minion Instability mechanic, because it makes the boring and lazy playstyle of summoners so much fun. Summon Raging Spirits are powerful, automatically guided missiles that go boom! Fun! But I didn't find any build. So I created my own. And because I find it really fun I decided to share it with you. As I mostly play Standard SSF, I want to keep my build SSF viable. The basic guild line will also be league-free. If there is anything special in the league I will point it out. What is our DPS?
Spoiler
There are 3 commonly known ways to make SRS Minion instability builds viable: 1) +# level of minion/fire/all gems on our wands 2) +#% Minion Damage modifiers anywhere 3) +#% Minion Life modifiers anywhere But there are also other hidden ways to make it even better: 1) The more minions you summon, the more pops they do resulting in higher DPS 2) The faster a Raging Spirit die, the more of them you can summon resulting in higher DPS Therefor our DPS is: DPS = (Casts_per_second) * (Damage_per_pop) * [((Fight_length) - (Time_to_pop)) / (Fight_length)], where (Casts_per_second) * (Time_to_pop) must be less or equal than 20 So lets say you can summon 5 Raging spirits per second, they go pop after 3 seconds, every Raging spirit do 500k damage and you will steadily summon them for 6 seconds until the boss dies (and we expect every Raging Spirit to hit it) Then our DPS is 5 * 500k * (6-3 / 6) = 1.25M DPS and we did 7.5M damage. Ok, this is not a good example because the fight was really short and only half of our Raging spirits actually did any damage due to the long 3 seconds wind up. So lets say the boss is really beefy and it takes 30 seconds to kill it while summoning Raging Spirits steadily. Then our DPS is 5 * 500k * (30-3 / 30) = 2.25M DPS and we did 67.5M damage. So what's out *ideal* DPS? 1) Ideally we want (Casts_per_second) * (Time_to_pop) -> 20 where (Casts_per_second) -> inf. and (Time_to_pop) -> 0 Now, realistically we can push (Time_to_pop) to somewhere between 1 and 2 seconds, but we also need some travel time for our Raging Spirits. The ideal time for (Time_to_pop) is somewhere around 1.5 seconds (1 screen). Therefore our ideal (Casts_per_second) is 20/1.5 = 13.3 Come on, what *is* the DPS then? With the +3 helmet, 1 Raging Spirit should have around 46000 Health Minion Instability causes 33% of our minions' Health as Fire damage => 15180 Damage / Spirit My Damage modifier is around 500% => 75900 Damage per / Spirit Let's say our (Time_to_pop) is 2 seconds, so we can deal 20 * 75900 every 2 seconds => 20 * 75900 / 2 = 759000 DPS Now, we have to add modifiers from debuffs. This is a bit harder, because it depends on the total Fire resistance of mobs. If the target had 0 fire resistance, our fire penetration support wouldn't do anything. But let's pretend *all* our debuffs work, so: - Fire Penetration 38% - Exposure on Hit 10% - Flammability 49% - Elemental Equilibrium 50% So it's basically another 150% damage modifier. That means: 113850 / Spirit => 20 * 113850 / 2 => 1138500 DPS Is it too low? Well, it's DPS, not burst damage. I don't kill Conquerors in 1 hit, but they are still fast enough. League Starter? / SSF viable? / HC viable? / Pros, Cons?
Spoiler
League Starter?
Spoiler
Definitely (see video - SSF on 4-link). SRS is a great skill for leveling and is strong even with almost no investment in the gear. The only pickle is the crafting mod on our wands "Trigger a socketed spell when you use a skill", but it doesn't break this build if you don't have it. You will just have to cast it manually. SSF viable?
Spoiler
Yes, but with a little catch. The build requires 1 specific unique item that is not easily farmable - Tavukai. The amulet can be chanced, but it's not easy. The build can be played with --Infernal Legion Support-- instead, but it's a DPS loss and it's not as smooth as with the amulet. HC viable?
Spoiler
No. While SRS is a skill that is commonly used for HC characters, and we have many defensive layers, this build does not focus on HC. I believe you can modify it to make it viable, but I won't do it. Pros, Cons?
Spoiler
Pros: - Cheap to make it work with high DPS - Feels extremely tanky - Active, fast paced combat, not a lazy summoner - Very mobile, Flame Dash is used for traversing long distances and buffing, not for moving in a fight - Easy to follow improvements on your gear, craft-only viable (for SSF) - Doesn't require 6 link to farm maps (maybe not the highest tears though) - 6-link for our specters doesn't require off-coloring - HotG viable! Cons: - Expensive for min/maxing (the damned wands) - Heavy mana regeneration requirements, mana flask needed - Evasion based characters suffer on boss fights with non-dodgable mechanics - Small (4-links) off-coloring is needed - Socket starving Basic viable build / Super budget version
Spoiler
The following specification is the absolute minimum you can run this build with. Wands x2: Rare Profane Wands with "Trigger a socketed spell when you use a skill" craft. Swap weapons: Any weapon with at least 1 green socket Body: Tabula Rasa Helmet: Any rare Evasion based helmet with 4 linked sockets Gloves: Any rare Evasion based gloves with 4 linked sockets Boots: Any rare Evasion based boots with 4 not-linked sockets Amulet: Tavukai Unique amulet Ring 1: Any rare Unset ring with red socket Ring 2: Any rare ring Belt: Any rare Stygian Wise Jewel: Ghastly jewel with "Minions deal #1 to #2 additional fire damage". The only stats you care about are resists, evasion (the higher the better), +health and +minion modifiers. With this setup you will lack both damage and survivability, but at least you will be able to farm maps to get more currency, and to improve your equipment. Skill links are the same as in final version, the only difference is in Summon Raging Spirits and Raise Specters. In budget version, put Spectres in your helmet (4-link) and Summon Raging Spirits in your Tabula Rasa. Use these gems: Summon Raging Spirit (21/23) + Minion Damage Support (21/23) + Minion Life Support (21/23) + Spell Echo Support (21/0) + (Fire Penetration Support (21/23) + Elemental Focus Support (21/23)) > Final build <
Spoiler
PoB :::: PoB 3.13: https://pastebin.com/B4PsmU3c Everything is inside. Lab setups, gem setups, items, leveling, min/max (kind of). Equipment
Spoiler
Wands:
Spoiler
2x Rare Profane wands Prefixes: - +1 Level of all Fire Spell Skill Gems - +1 Level of all Spell Skill Gems - Minions deal # increased damage Suffixes: - Can have up to 3 crafted modifiers - Trigger a socketed spell when you use a skill - #% increased cast speed We use preferably Profane Wands for "#% increased cast speed" implicit. You can use Convoking Wands but you will lack cast speed. To get +2 wands is extremely hard and expensive. This build works well even with only +1 Wands. The rest is crafted for 2 exalts. Helmet:
Spoiler
iLvl 86+ Rare Elder Helmet (preferably evasion based) Prefixes: - +3 to level of socketed minion gems - Socketed gems are supported by level # Minion Life - Socketed gems are supported by level # Minion Damage Suffixes: - Anything you like It's really hard to get a helmet like this. Any iLvl 74+ Elder helmet with Minion Life + Minion Damage is enough to clear anything in this game. Chest:
Spoiler
Kintsugi This is a defensive armor. As we run only ~5k Health (+ unreliable buff from Steelskin) this armor provides great additional buffer, it's basically additional 1k health. Of course you can use anything else as this armor is not build-enabling, but honestly there aren't many useful armors for summoners, and probably 0 evasion based ones. I love this armor. This armor drops from Deadly Rivalry V prophecy chain. Gloves:
Spoiler
Rare Slink Gloves Prefixes: - +# to maximum life - (crafted) Minions deal #% increased damage Suffixes: - Resists Boots:
Spoiler
Atziri's Step These are great boots easily obtainable. Put "8% chance to Dodge Spell Hits if you've taken Spell Damage Recently" enchantment and you're gold. If you lack resists you can use Rare Slink Boots with Life and resists. Rings:
Spoiler
Rare Unset Ring + Rare Vermillion Ring You can use any rare rings. Try to get Life + resists. Redeemer influenced rings can get "Minions deal #% increased damage". Amulet:
Spoiler
Tavukai This is build-enabling item. Try to get the lowest roll on the mod "Minions have -#% to Chaos resistance". Anointment: Dark Arts. Dark Arts is a great passive skill. The only problem is that to get it we would have to spend lots of points with not completely useless but rather mediocre effects. Anointment is the best way to get it. Belt + Jewel:
Spoiler
Rare Stygian Wise Life and resists. Ghastly Eye with "Minions deal #1 to #2 additional fire damage" and "Manions have #% chance to taunt on hit with attacks" Jewel:
Spoiler
Eficient Training This jewel is used to get Strength requirements for max level of --Steelskin-- without any +Strength on our gear. While it's not build-enabling, without it you would have to either get +Strength on your gear somewhere or to run lower level of --Steelskin--. Flasks:
Spoiler
#1 Life Flask with Bleed immunity (of Staunching) #2 Jade Flask with Curse immunity (of Warding) #3 (optional) Quartz Flask with Shock immunity (of Grounding) - this is a flex spot #4 Stibnite Flask with Freeze immunity (of Heat) #5 Enduring Mana Flask with Ignite immunity (of Dousing) #6 Enduring Mana Flask with Poison immunity (of Curing) #5 and #6 are exchangeable depending on the mods of your map. However, it must be Enduring. Without this prefix we would struggle with mana regeneration. Skill links
Spoiler
Wand #1
Spoiler
Flesh Offering (21/0), Steelskin (21/23), Summon Stone Golem (21/0) 1) We use Flesh Offering to buff ourself via Mistress of Sacrifice Ascendancy for more cast speed and movement speed, and to buff our skulls for more attack speed and movement speed for better map clearing. This is the best offering we can get. 2) Using Steelskin in our wand with the crafting mod "Trigger a socketed spell when you use a skill" is much better than the standard setup with CWDT. The point is that we can use max level for greater shield and generally for evasion based character this feels better, because it gives you additional shield *before* you take a damage, not after. It also synergize well with Kintsugi Chest piece. 3) Summon Stone Golem is my favorite golem for the nice life regeneration. If you want you can use different golem or none at all. I put it in the wand to ensure the maximum uptime and the QoL aspect of not having to care about it ever. Surprisingly, golems are spells, so the crafting mod "Trigger a socketed spell when you use a skill" works on them. Wand #2
Spoiler
Vaal Summon Skeletons (21/0) + Feeding Frenzy Support (21/23) + Elemental Army Support (21/0) 1) Vaal Summon Skeletons is used for extra DPS on bosses, but the placement in the wand is extremely important too for two reasons: taunt and fire resistance debuff. For this to work we need Ghastly Eye Jewel with two mods: "Minions have #% chance to taunt on hit with attacks" and "Minions deal #1 to #2 additional fire damage". The first mod is just a defensive layer. The second one is a mod that enables Elemental Army Support to work. Without the mod our skeletons will deal only physical damage and it won't proc Exposure on Hit debuff. 2) Feeding Frenzy Support is used to make our skeletons aggressive, so they hit asap, taunt asap and debuff asap. Feeding Frenzy buff is just another nice buff to our Raging Spirits. 3) As explained in 1) Elemental Army Support requires "Minions deal #1 to #2 additional fire damage" mod to work. Helmet
Spoiler
Summon Raging Spirit (21/23) + Spell Echo Support (21/0) + Fire Penetration Support (21/23) + Elemental Focus Support (21/23) 1) Instead of Spell Echo Support you can use Unleash Support, but I prefer the former one for consistent casting. 2) If you have "Socketed gems are supported by level # Burning Damage", you can use Combustion Support instead of Elemental Focus Support (21/23) Chest
Spoiler
Raise Spectre (21/0) + Ice Bite Support (21/0) + Hypothermia Support (21/0) + Elemental Proliferation Support (21/23) + Added Cold Damage Support (21/23) + Chain Support (21/0) 1) Specters are used for extra defensive layer. They will freeze everything on the screen including bosses (well, not all of them). They also hardly die even in hard fights. Two spectres are enough, chain support can be exchanged if you prefer something else, but for packs chain is superior to everything. Gloves
Spoiler
Frenzy (1/0) + Added Lightning Damage Support (1/20) + Curse On Hit Support (21/23) + Flammability (21/23) 1) Why I use Frenzy instead of Lightning Ball or Arc or something with build-in lightning damage and actual aoe? Because I use it only on bosses. Frenzy also generates frenzy changes on bosses for more casting speed especially in fight without corpses (and therefor our useless offering). You can use your own link to apply Flammability and Elemental Equilibrium. 2) Added Lightning Damage Support is used to enable Elemental Equilibrium debuff. Our Raging Spirits do fire damage, our Spectres do cold damage. Win-win. Boots
Spoiler
2-link: Flame Dash (21/23) + Arcane Surge Support (~5/0) Single socket: Clarity (~10/0) Single socket: Grace (21/0) 1) Make sure to have appropriate level of Arcane Surge Support, so you get the buff from every cast of Flame Dash. Arcane surge gives us Mana regeneration and more cast speed. 2) I don't recommend greater than level 10 for Clarity. 3) I also don't recommend to use Vaal version of Grace. You can use it for additional defensive layer, but it will compete for souls with Summon Skeletons and our skeletons are better. Unset Ring
Spoiler
Flesh and stone (21/0) Great additional defensive layer. Swap weapon
Spoiler
Desecrate (1/0) If it ever happens your Spectres die, this is an easy way to resummon them. Passive Tree :::: See PoB. Pantheon
Spoiler
Recommended general setup: Major God: Soul of Lunaris Minor God: Soul of Ryslatha Use whatever you like, I prefer the setup above. Bandits
Spoiler
Kill all or help Lord Kraityn (until maps) Lord Kraityn has 3 useful bonuses. Later, its better to exchange it for a jewel slot with minion damage/life. Spectres
Spoiler
Frost Sentinels They can be found in The Lunaris Concourse in Act 8. They are ranged mobs and they fire 2 projectiles. Chain support (+2 chain) and two spectres can hit 12 targets with 1 cast. Their main goal is to freeze everything on the screen. Try it, it works :) For (tough) boss fights you can exchange them for something else, but you would have to exchange the support gems as well. I just don't bother. Passive tree, skills and equipment mechanics and synergy discussion
Spoiler
*Dark Arts (Anointment) + *Fleefoot + Arcane Surge Support
Spoiler
With 1 cast of Flame Dash we get (apart from the other passive buffs): +20% cast speed for 4 seconds +30% Mana regeneration for 4 seconds So it's best to use flame dash at least once in 4 seconds. While mapping, this is not an issue, but keep this in mind in boss fights. Steelskin + Kintsugi (unique chest armor)
Spoiler
- Steelskin level 21 provides a shield of 2403 points. 70% is taken from it when hit. 2403 * 0.7 = 1682 - Life shield Kintsugi lowers the hit by 20%. Assuming we run 5k health, this is additional 1000 Life shield Effective Health pool (approx.) = 5000 + 1682 + 1000 ~ 7500 Life. Maybe it's more if you count other reductions. I don't know. The point is you won't die unless you screw up mechanics :) Flesh and Stone + Frost Sentinels (Spectres) + Summon Skeletons (jewel with taunt) + Grace + high evasion/dodge chance
Spoiler
You will hardly get hit. And if you don't get hit you can't die. See? We turned to "Just don't get hit, bro" pros :) Add the layer from Steelskin and Kitsugi and now you can see where all the tankiness comes from. High movement speed and fast recovery on movement skills also helps. Leveling
Spoiler
Act 1
Spoiler
- Get Arcane Surge Support from the big chest on the beach at the beginning of the game. Fight the beach and take Raise Zombie as a reward. - Keep using it with fireball together. Don't level up Arcane Surge Support. Go to Tidal Island and finish the quest Mercy Mission. Take Quicksilver Flask and Elemental Proliferation Support as a reward. Link it with Raise Zombie gem. - Get Summon Raging Spirit as a reward from Breaking Some Eggs and put it instead of Raise Zombie gem. Stop using Raise Zombies and Fireball skills. - Buy Steelskin and Dash from Nessa. You will need +Str and +Dex somewhere on the gear to use them. - Go to The Prison and take Minion Damage Support as a reward. Buy other gems from Nessa: Added Cold Damage Support, Added Lightning Damage Support. Use them as you see fit (or store them for later). - Return to the prison, finish first ascendancy trial and kill Brutus. Take Summon Skeletons as a reward and buy other gems from Nessa: Flame Dash, Clarity, Infernal Legion. Start using Infernal Legion even without Minion Instability keystone. Your SRS link should be: SRS - Infernal Legion - Minion Damage. - Go to Marveil's Cavern and back to town. Take Flesh Offering as a reward. - Finish Act 1. Act 2
Spoiler
- Go to The Broken Bridge and Help Kreytin. Go to The Crypt and solve 2nd trial. Progress the quest there. - Go to The Chamber of Sins and solve another trial. Progress the quest there. Take Desecrate from Greust as a reward. - Go to The Western Forest and progress quests there. Visit Weaver's Chambers and kill the beast there. Take Elemental Focus Support as a reward and buy Minion Life Support from Yeena. - Finish Act 2. Act 3
Spoiler
- Go to The Crematorium, finish the quest and also solve another trial there. Take Flammability as a reward. - Go to The Catacombs and solve another trial there. - Go to The Solaris Temple Level 2 and progress the story. - Go to The Ebony Baracks and finish the quest Sever the Right Hand. Take raise spectre as a reward. You can start using them, but they will probably be useless for now. - Progress through the story, then go to The Imperial Gardens. Solve the trial there and claim the Waypoint. Now go the Labyrinth and finish it. 3-link is enough to do it. Take Necromancer ascendancy. - Return to The Imperial Gardens and go to The Library. Solve the quest there and take Fire Penetration Support as a reward. Buy all available gems from the vendor: Feeding Frenzy Support, Elemental Army Support, Ice Bite Support, Hypothermia Support, Grace, Frenzy, Flesh and stone. - Finish Act 3. Act 4
Spoiler
- As you progress to Acrobatics keystones, start getting evasion based equipment. But don't off-color yet. Prefer sockets before evasion. But you should get evasion based armor with 4 link (for spectres) asap. - Go to The Dried Lake and finished the quest. Take Summon Stone Golem as a reward. Progress through the mines and kill both Kaom and Daresso. Take Spell Echo Support as a reward. Buy Chain Support and Curse On Hit Support from Petarus and Vanja. - Now you have all the required gems for the build. - Finish Act 4. Act 5
Spoiler
- Do the quest The Key To Freedom and take Stibnite flask as a reward. - Finish Act 5. Act 6
Spoiler
- Go to the Twilight Strand and do the quest. Now you have access to all gems in the game (except drop-only obviously). If you followed the guide you wouldn't need that, but sometimes our gear doesn't allow us to use what we want, so it's nice to be able to buy any gem for replacements. - Go to The Prison and solve the trial there. - Finish Act 6. Act 7
Spoiler
- Go to The Broken Bridge and finish the quest The Silver Locket. Take Jade flask as a reward. - When you hit level 54, start chancing every Coral Amulet you find or buy to have change to get Tavukai (especially for SSF). It may take a while to get it, so keep using Infernal Legion until you get it or buy it. - Also start vaaling every crimson jewel for the chance to get Efficient Training jewel. - Go to The Crypt and to The Chamber of Sins (level 2) and solve the trials there. - Finish Act 7. Act 8
Spoiler
- Firstly, go to the second Labyrinth. - Enter Sewers and kill Doedre. Take Unset Ring as a reward. - Go to The Bath House and solve another trial there. - Go to The Lunaris Temple to get Frost Sentinel Spectres. You should be able to have two spectres. If they don't freeze check your links. The most effective 4-link for freezing is Raise Spectre - Elemental Proliferation Support - Ice Bite Support - Chain Support. - Finish Act 8. Act 9
Spoiler
- Go to The Blood Aquaduct and farm Tabula Rasa chest. 4-link is enough for early mapping, but if you don't get anything better, this is the way to progress through yellow maps. - You also want to start farming Immortal Syndicate members to get "Trigger a socketed spell when you use a skill" craft. - Go to The Tunnel and finish another trial. Other then that there is nothing in this act to focus on. - Finish Act 9. Act 10
Spoiler
- Go rescue Bannon and take Quartz Flask as a reward. Now you should have all three utility flasks if you haven't got them yet. Use beast crafting to craft appropriate suffixes to your flasks. Try to focus on getting decent equipment, because 3rd Labyrinth and mapping is near. - Get evasion based gear, cap resistances and off-color the good ones. - Go to the mines for the socket and colors recipes. - Go to The Ossuary and finish the last trial. - Finish all the areas until the very last quest - An End to Hunger. - Enter the third Labyrinth. If you have all resistances 110%+, you can take Mistress of Sacrifice first. - Finish Act 10. Maps
Spoiler
- Farm Immortal Syndicate to get the craft "Trigger a socketed spell when you use a skill". - Farm prophecies to get Deadly Rivalry V and Kintsugi armor. - Farm Elder influenced maps and craft 6-link helmet for SRS. - Farm Atziri for the unique boots. - Farm better gear a level up gems. - Have fun. List of all gems, TL;DR version
Spoiler
Act 1 - Arcane Surge Support, lvl 1, get at the beginning of the game - Elemental Proliferation Support, lvl 1, get as a reward from the quest Mercy Mission - Summon Raging Spirit, lvl 4, get as a reward from the quest Breaking Some Eggs - Steelskin, lvl 4, buy from the vendor (Scroll of Wisdom) after the quest Breaking Some Eggs - Minion Damage Support, lvl 8, get as a reward from the quest The Caged Brute - Flame Dash, lvl 10, buy from the vendor (1x Orb of Transmutation) after the quest The Caged Brute - Clarity, lvl 10, buy from the vendor (1x Orb of Transmutation) after the quest The Caged Brute - Summon Skeletons, lvl 10, buy from the vendor (1x Orb of Transmutation) after the quest The Caged Brute - Added Cold Damage Support, lvl 8, buy from the vendor (1x Orb of Transmutation) after the quest The Caged Brute - Added Lightning Damage Support, lvl 8, buy from the vendor (1x Orb of Transmutation) after the quest The Caged Brute - Flesh Offering, lvl 12, get as a reward from the quest The Siren's Cadence Act 2 - Desecrate, lvl 16, get as a reward from the quest Intruders in Black - Elemental Focus Support, lvl 18, get as a reward from the quest Sharp and Cruel - Minion Life Support, lvl 18, buy from the vendor (1x Orb of Alteration) after the quest Sharp and Cruel Act 3 - Flammability, lvl 24, get as a reward from the quest Lost in Love Raise Spectre, lvl 28, get as a reward from the quest Sever the Right Hand - Fire Penetration Support, lvl 31, get as a reward from the quest A Fixture of Fate - Feeding Frenzy Support, lvl 31, buy from the vendor (1x Orb of Chance) after the quest A Fixture of Fate - Elemental Army Support, lvl 31, buy from the vendor (1x Orb of Chance) after the quest A Fixture of Fate - Ice Bite Support, lvl 31, buy from the vendor (1x Orb of Chance) after the quest A Fixture of Fate - Hypothermia Support, lvl 31, buy from the vendor (1x Orb of Chance) after the quest A Fixture of Fate - Grace, lvl 24, buy from the vendor (1x Orb of Alteration) after the quest A Fixture of Fate - Frenzy, lvl 16, buy from the vendor (1x Orb of Alteration) after the quest A Fixture of Fate - Flesh and stone, lvl 16, buy from the vendor (1x Orb of Alteration) after the quest A Fixture of Fate Act 4 - Summon Stone Golem, lvl 34, get as a reward from the quest Breaking the Seal - Spell Echo Support, lvl 38, get as a reward from the quest The Eternal Nightmare - Chain Support, lvl 38, buy from the vendor (1x Orb of Alchemy) after the quest The Eternal Nightmare - Curse On Hit Support, lvl 38, buy from the vendor (1x Orb of Alchemy) after the quest The Eternal Nightmare Min/max and crafting
Spoiler
WIP
Last edited by troomar#6125 on Jan 13, 2021, 7:49:26 AM Last bumped on Jul 7, 2020, 10:42:16 AM
|
|
|
Updates
Spoiler
01/13/2021 - Nothing significant changed for 3.13 - Added up-to-date PoB 06/18/2020 - Updated PoB with slightly modified passive tree (due to changes in 3.11). For now 3.10 is kept too. 06/17/2020 - Deleted WIP flag. Changes may still occur :) 06/07/2020 - Visual changes to the post. 06/06/2020 - First version of my build is up - Still WIP for the upcomming 3.11 patch Last edited by troomar#6125 on Jan 13, 2021, 7:42:00 AM
|
|
|
Reserved.
Before 3.11 thoughts.
Spoiler
Ok, the first version as I used it for 3.10 is up. Now, we have to wait for the patch notes to see if anything is gonna change.
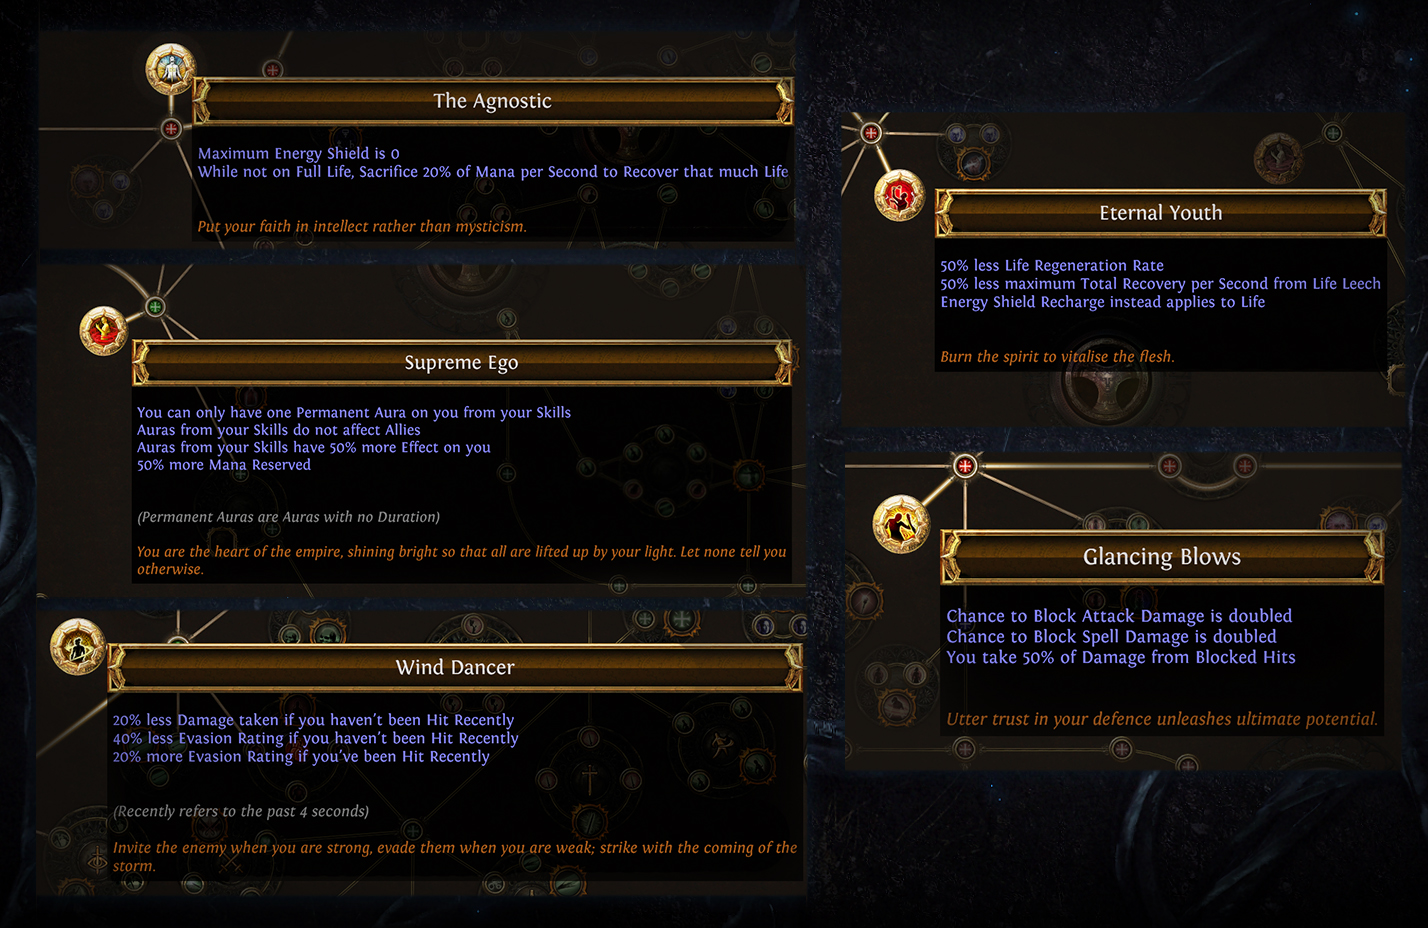
First food thought: - Wind Dancer is gonna be a part of the passive tree. I think this passive will be really good for Raiders. I'm not so sure about my build, because 40% less evasion is too much. Probably not worthy. 06/15/2020 - So far nothing specific for MI or Minion builds generally, but let's wait for full patch notes. - Look at these crafting options. It's co cool for SSF. It seems we are getting QoL updates! :) 06/17/2020 - Patch notes are up and there seems to be almost no changes to the build. Here are some changes to note: - The Shakari God Power no longer makes you immune to poison. It now causes poisons on you to have 50% less duration, and prevents you from being poisoned while there are at least 5 poisons on you. This was a great effect for some encounters. Now it's still good, but not that good. Keep using Soul of Ryslatha as default choice. - The Hunter influenced ring modifier that grants faster start of Energy Shield recharge is now instead found on Redeemer influenced rings. Existing items with this modifier are unaffected. It has yet to be seen how it affects crafting of Redeemer influenced rings (for extra Minion Damage modifier). It will probably just enlarge the pool of available mobs. - Passive tree: Aligned Spirits: - buff, 10% increased maximum Mana -> 15% increased maximum Mana Fearsome Force: - nerf, Minions deal 15% increased Damage -> Minions deal 10% increased Damage - buff: Minions have 10% increased Area of Effect -> Minions have 15% increased Area of Effect Generally small number rebalances, not a big deal Lord of the Dead - buff: Minions have 10% increased maximum Life -> Minions have 15% increased maximum Life - nerf: 30% increase Minion Accuracy Rating -> (deleted) The missing Accuracy has no effect to our Raging Spirits, but it can affect Skeletons' taunting capabilities. We will see, but I don't think it will be a problem. Other notes: - I still have to analyze the whole passive tree changes when it's up in PoB as there are some new skills. - With corpse mechanics revisited and supported in the skill tree I'm now even more tempted to utilize (small) corpse generation in the build. It will cost the golem's gem in the wand. Note. I already tried to use corpses in the build, but it required ascendancy points to utilize them. It worked, but ultimately I found Frenzy + Sacrifice skills more effective. 06/18/2020 - This is the final theoretical update before the new league - Due to passive "Aligned Spirits" being shifted to the other side of the center wheel, there is no easy way to get it anymore. Moreover, some lesser valuable passives were even slightly nerfed. Therefore, I altered the passive tree to take advantage of it. - Overall the changes in passive tree are small, we lose a bit of health, but gain in other departments. The most notable changes: - A chose different path from the Witch starting point to Acrobatics keystone. It costs few more skill points, but it gave us the possibility to allocate Aligned Spirits again. - Now, we have an easy access to 2 jewel sockets - I omitted passives above Acrobatics and put these point to similar effects all over the passive tree - For end-game I chose to try out the new keystone - Wind Dancer. For it I will have to alter the passive tree a bit around lvl 93-94. Mind I still need to test it if it's worthy. Last edited by troomar#6125 on Jun 29, 2020, 5:36:56 PM
|
|
|
Hey OP, thanks for the neat build guide. I actually spent a lot of time in 3.9 and 3.10 testing Raider SRS. Mostly using the Ahn's heritage + fragility interaction for continuous, double powered onslaught. You cap evasion very easily, can get maxed dodges, and get some juicy cast/movespeed bonuses.
Here are some ideas: Fire https://pastebin.com/E9C3a1kk Freeze https://pastebin.com/V7PVaF9i Skelly mage https://pastebin.com/WUcYgm75 My experience: Unfortunately, in real life, I found that evasion + minions just doesn't work. There are too many ground effects that will kill you, and the way they are tuning bosses right now, your whole SRS army gets wiped right away without the minion life from necro ascendency. Add to that, many bosses are spawning their own minions, so single target Skills are impossible to scale. The game is really punishing right now for anyone who wants to get creative with defences, rather than just stacking screenwide DPS. |
|
|
Well, of course Raider can easily cap evasion, the whole ascendancy is nothing but evasion bonuses. It would be sad otherwise. :)
Fire https://pastebin.com/E9C3a1kk MI Skeletons are not viable. Not even with 2 Earendels. I know there is a build on this forum and I actually tried it (I actually tried many variations), but it's squishy as hell while the damage is not impressive at all. Skeletons are slow and are too few to do good damage. Vaal skeletons are fine. In your build I don't like the hassle with Ahn's Heritage. You spend too many passive points just to get the bonuses from the shield. And the bonuses are meh. Armor is wasted with Acrobatics. Block is wasted with acrobatics. Onslaught is fine, but not *that* important for MI. The items are all over the place too - Armor based chest. I know, it's another defense layer, but do you really need it as a Raider? Triad Grip - it does nothing to MI. MI is pure fire damage. ...etc. Not good. Freeze https://pastebin.com/V7PVaF9i You don't have MI keystone taken and no way to make them low heath so I assume this is not MI build. I can't comment on it as I didn't play non-MI SRS. Skelly mage https://pastebin.com/WUcYgm75 The same is above. Not MI build. Ground effects are annoying for everyone, it's not just for evasion builds. And yes, the 3.10 league was kind of full of ground effects. SRS don't get wiped. There are immune to ground effects and monsters won't target them (they can't even taunt). They can die, but in my build they have both physical and elemental resistances, so the only way they could die is from chaos damage that is not a ground DoT ... I don't have this problem at all. SRS MI is both single and aoe. The radius of MI is stated to be 22. Yes, non-MI builds have this problem, but it's something completely different and you can't just switch MI and non-MI build by grabbing the keystone. They scale differently and must be build around differently. So I think what you say applies to non-MI builds. |
|
|
I'm following this build for my Harvest league starter. I don't normally play minions - really appreciate the detailed guide. Thanks
|
|
|
I'm glad to hear that :)
|
|
|
Ok, here is some experience after a week of the league:
- Wind Dancer keystone with Kintsugi feels awesome. This is not a surprise, but a confirmation it works nonetheless. Try to get it by the 91st level! (currently in the PoB it's not included in the 91 level passive tree, but it's easy to respec few points here and there to get it) - The different way to get to Acrobatics introduced in 3.11 is a bit tricky. Firstly, I exchanged Cruel Preparation cluster for Quick Recovery cluster. It gave me approx. the same level of life, but I also got extra mana recovery. All right. Then, due to the new path I got Harrier passive. With it I got extra cast speed. Moreover, Dark Arts passive (used for annointment) was nerfed. All together I'm not using this annointment anymore! Instead I chose Hearth of the Warrior. Why you may ask? Well, since I dropped the upper part of the tree above Acrobatics, it was really tight with maximum life. In T16 maps (on level 91) I didn't feel safe. I may reflect this experience in the next update, but for now, if you're missing life on your gear, drop some minion nodes and pick maximum life on the tree. I feel like having at least 4500 life on level 91 with both Kintsugi and Wind Dancer key stone in really necessary. Unless you want to spend more than 5 minutes in a map. - Since I've been playing in a group of two this league I can boldly say this build is able to keep pace with speedrunning Shadow archer :) "Where is the boss?" "We've probably killed it somewhere already." I'm not kidding :) - For leveling, keep 5 socket gear in your stash. With the current league being SSF friendly it's really easy to get a 5-link very early. I got mine at the beginning of act 6. That's all for now. |
|
|
Looks good mate, was looking for something different, gonna respec, will let you know how it goes :)
|
|
|
Ad SirCalmness: Cool, let me know how works for you.
I have another small update, nothing build breaking: - I exchanged 1 support gem in the main SRS link - I exchanged Elemental Focus / Combustion for Deathmark Support. Sure, DPS wise it's worse, but I've always had a problem with Legion encounters and Blight maps, because SRS tend to attack and kill different mobs than I wanted, especially marked mobs in Legion and bosses in Blight. With Deathmark I can choose these juicy mobs and focus them. It also works on bosses with many adds or with twin bosses. This issue is not really visible until you're in a party of 2-3 people, then these bosses get quite tanky. I opted to be a rather boss killer (with still a lot of clearing speed) in these parties. I'm not gonna change this in my build, I consider it to be within personal preferences, but I think it was worth mentioning. |
|


