


[2.5] HOWA Blade Chief - Tanky support, 10k ES. Shaper/Uber vids. 100k-200k DPS 4link totems!
|
The HOWA Blade Chief, Ancestral Warchief with Blade Flurry
While many of the HOWA builds out there follow the Raider path for frenzy charges, this build is set towards a more defensive and team based setup, with +8% max purity auras and conduit with all charges. This was my league starter, though I started about a week late, and the gear here was purchased rather cheaply at the time, though it may be extremely difficult to acquire the full list of items now. (Not that it's all necessary to run the build, but you will only get +6% max resistances without a few of the uniques). Why Hierophant? Hierophant allows us the choice of using a totem skill in conjunction with our attack skill. This gives us an adaptable, safer play style where we can allow our totems to soak up damage for us in dangerous situations, while still allowing us the option to attack and leech ourselves. Attacking in conjunction with our totems in tougher boss fights gives us comparable damage to other HOWA builds. We also take full advantage of Conviction of Power and Romira's banquet to constantly max out our endurance charges. In conjunction with our auras, this makes for a very tanky character that can support a party with strong defensive bonuses, while still being able to solo the game's toughest content. Blade Flurry Blade Flurry is our primary attack skill for this setup for its strong damage and range. It doesn't require a multistrike gem, which makes it much easier to gear towards, and since it is AOE, it scales with our totems. Under my current setup, the blade flurry damage is roughly the same as my totems when I'm not using concentrated effect. The totems also benefit from Elemental Overload, pushing their DPS even farther. Random tooltips
Spoiler
Standing DPS
Spoiler
Standing BF damage  Conc Effect BF damage 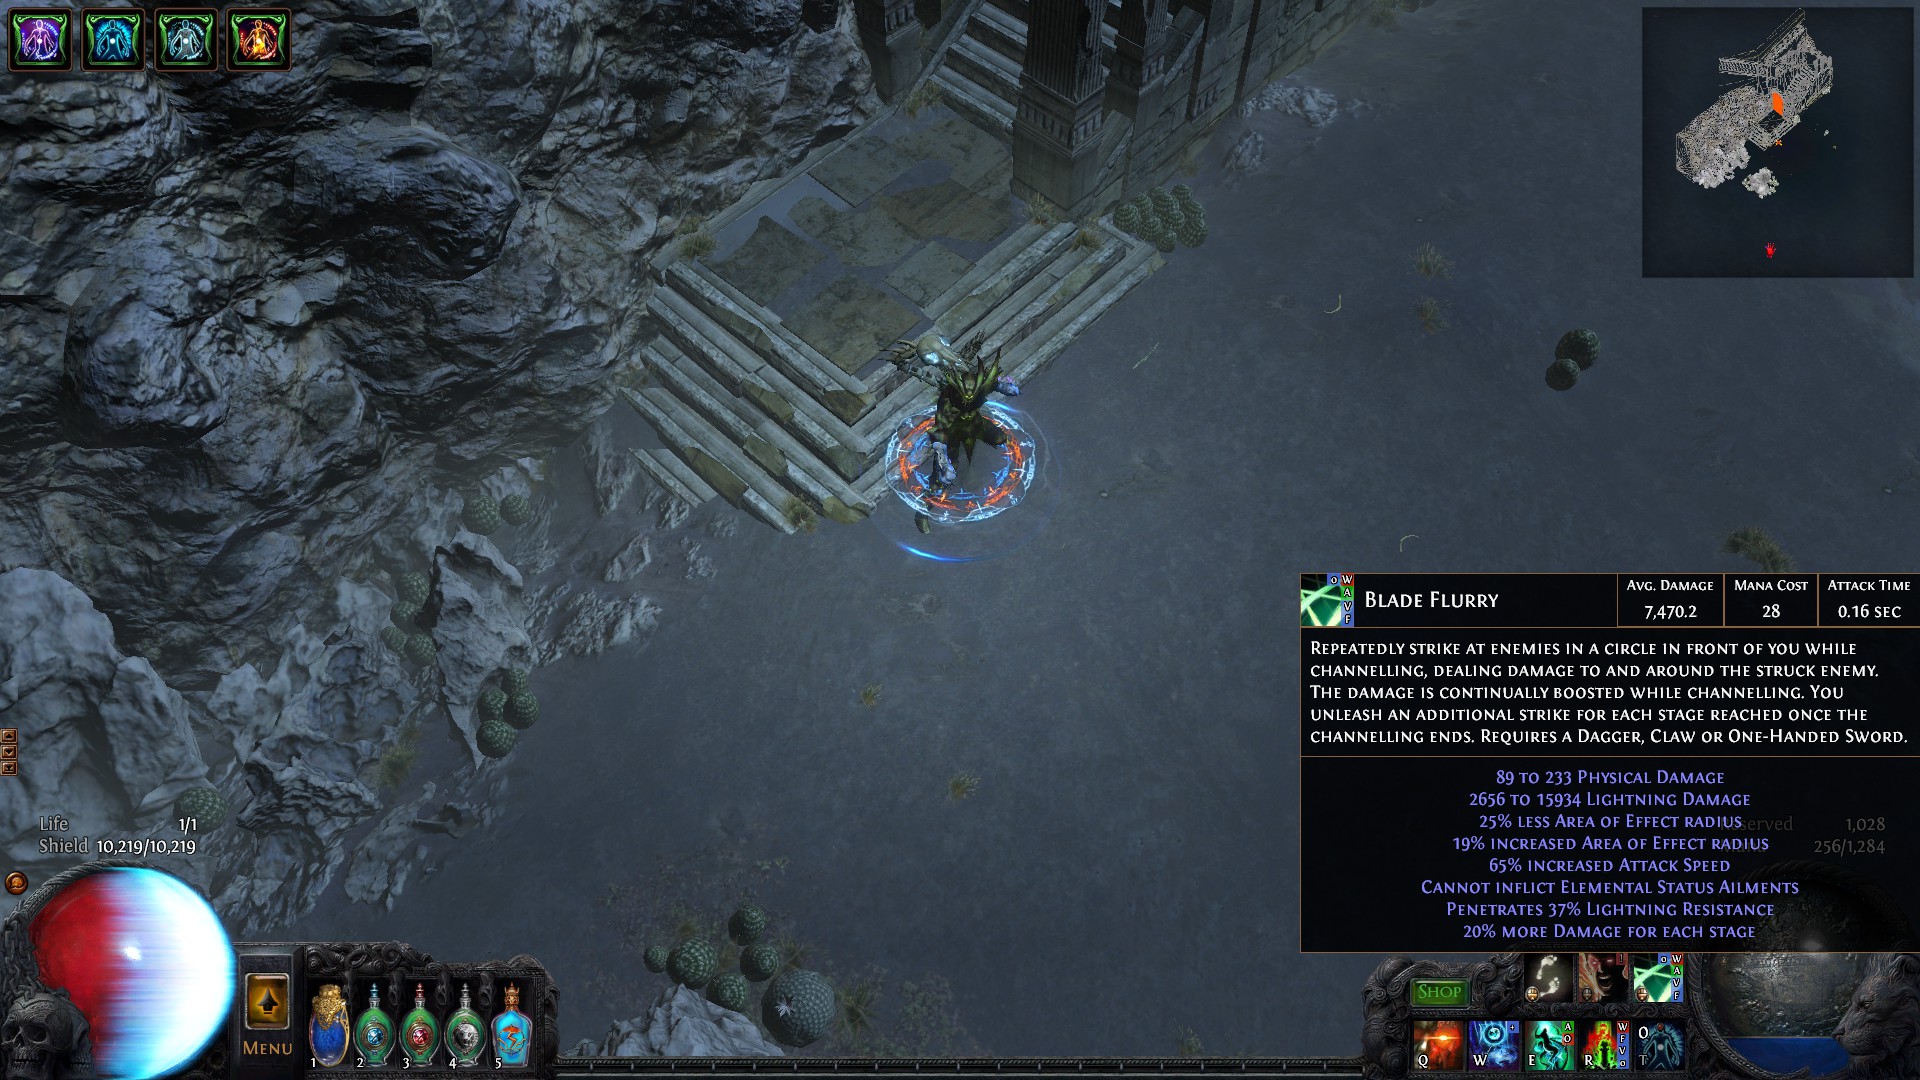 Triple totem damage, no buffs 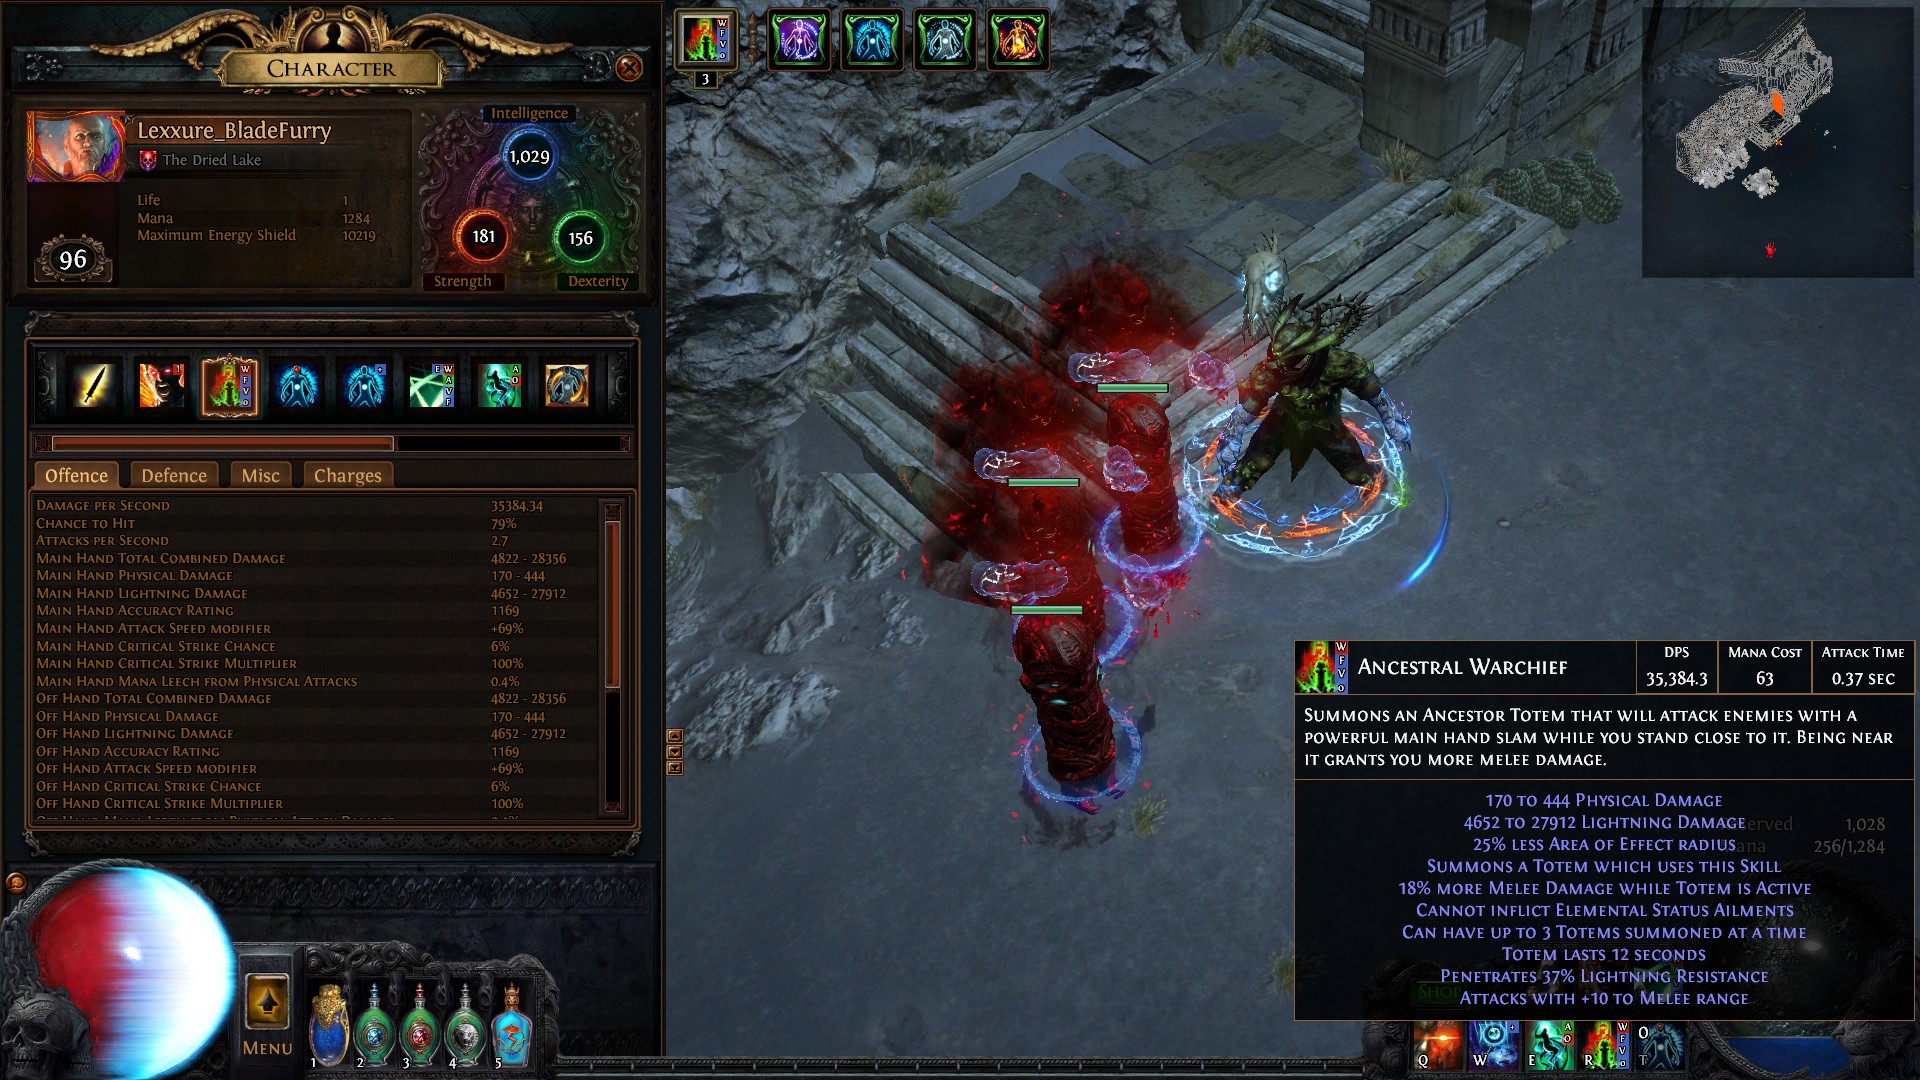 Blood Rage and frenzies up, with elemental overload _________________
Spoiler
Unrealistic, but this shows just how sporadic the DPS of Hierophant can be. A 40 kill streak giving increased damage, 100k damage per totem. 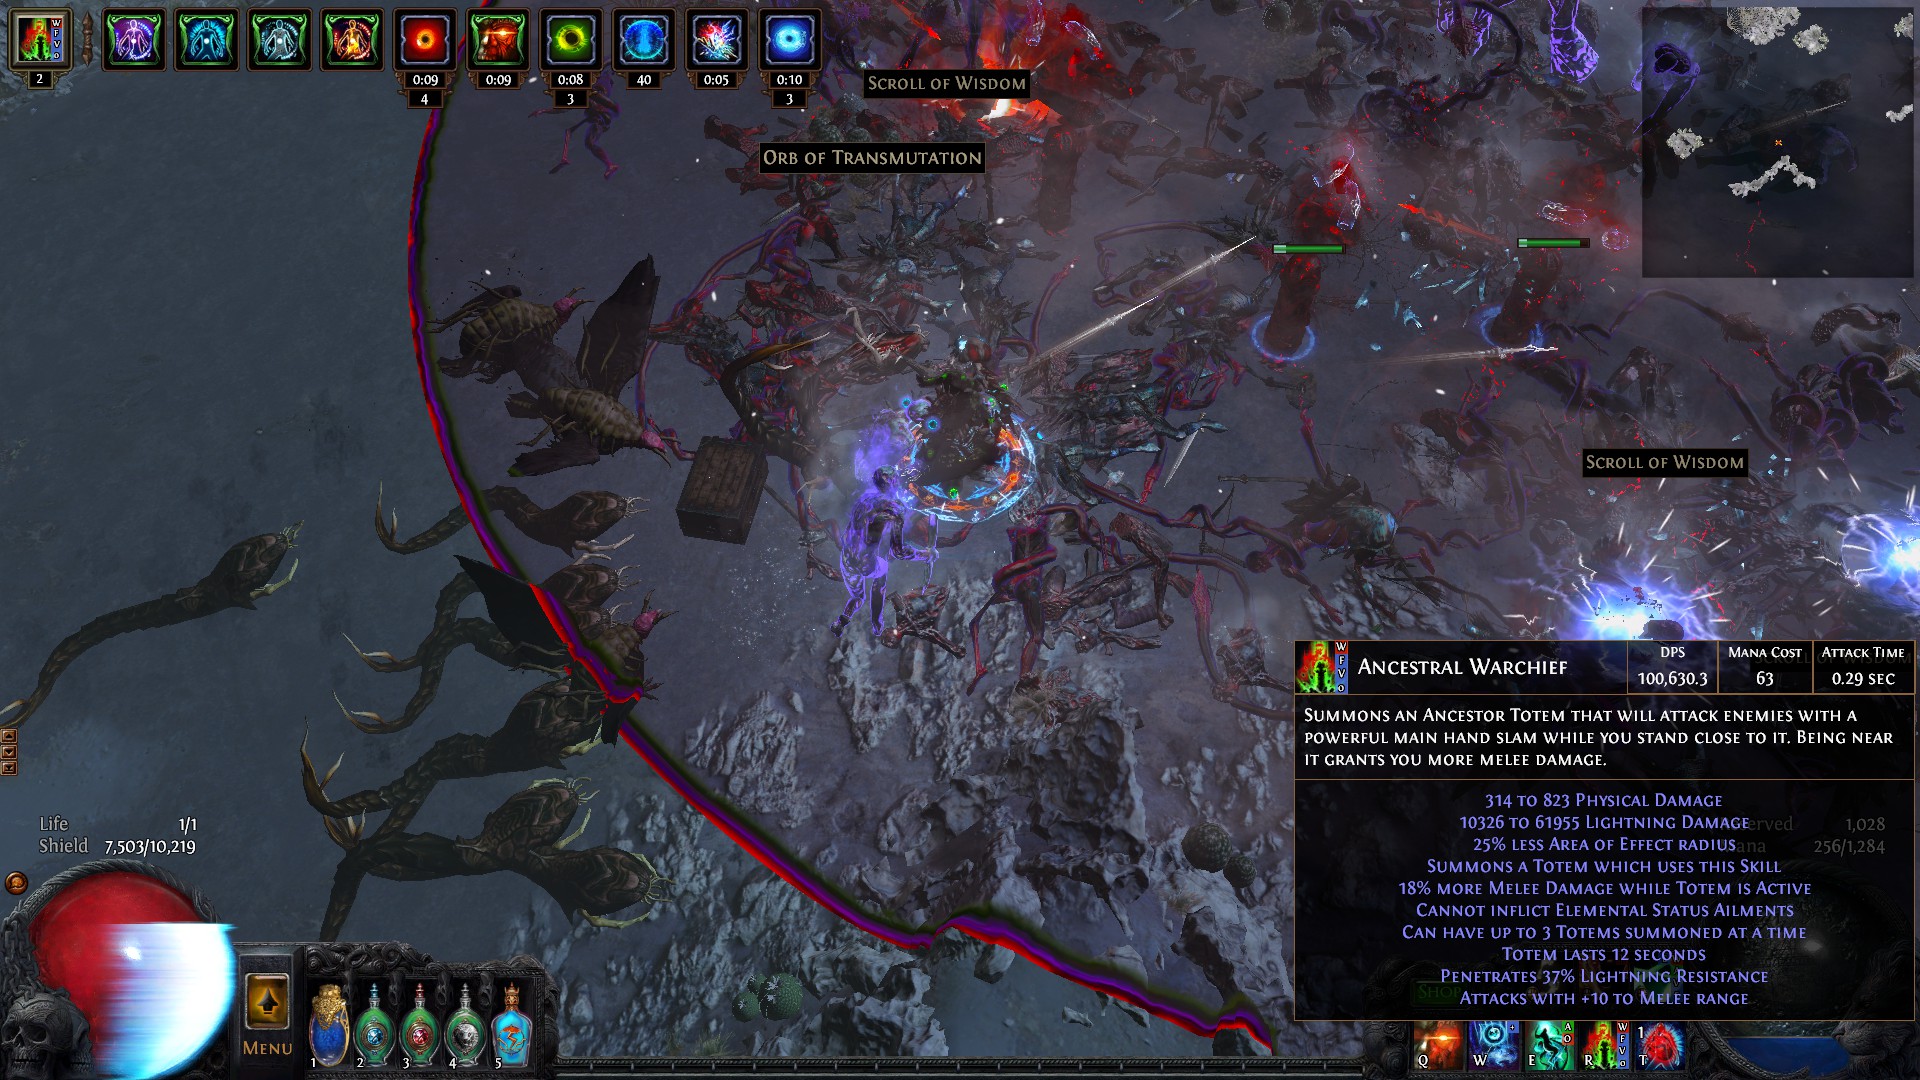 Again unrealistic, BF damage, note the 38 kill count 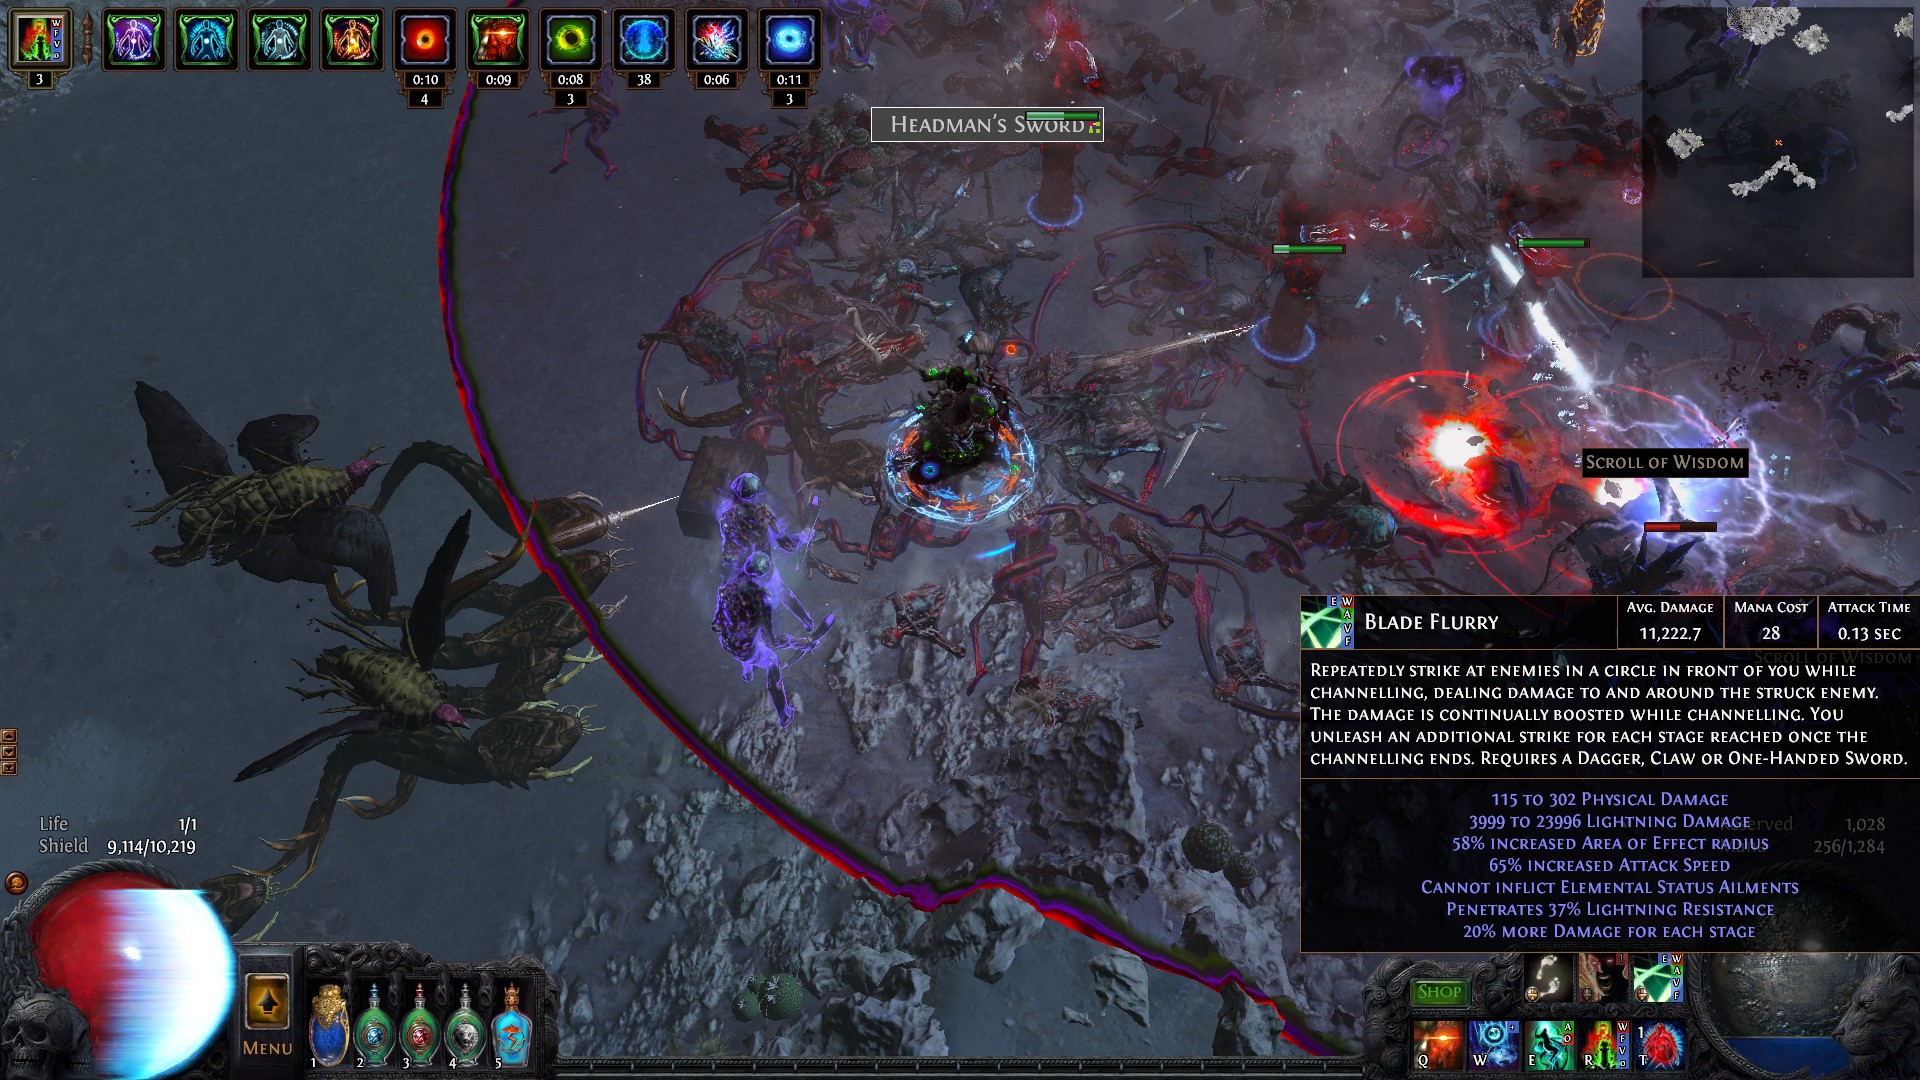 Much more realistic, BF damage, 9000 with inc aoe, 7 kill streak, EO, frenzies, blood rage 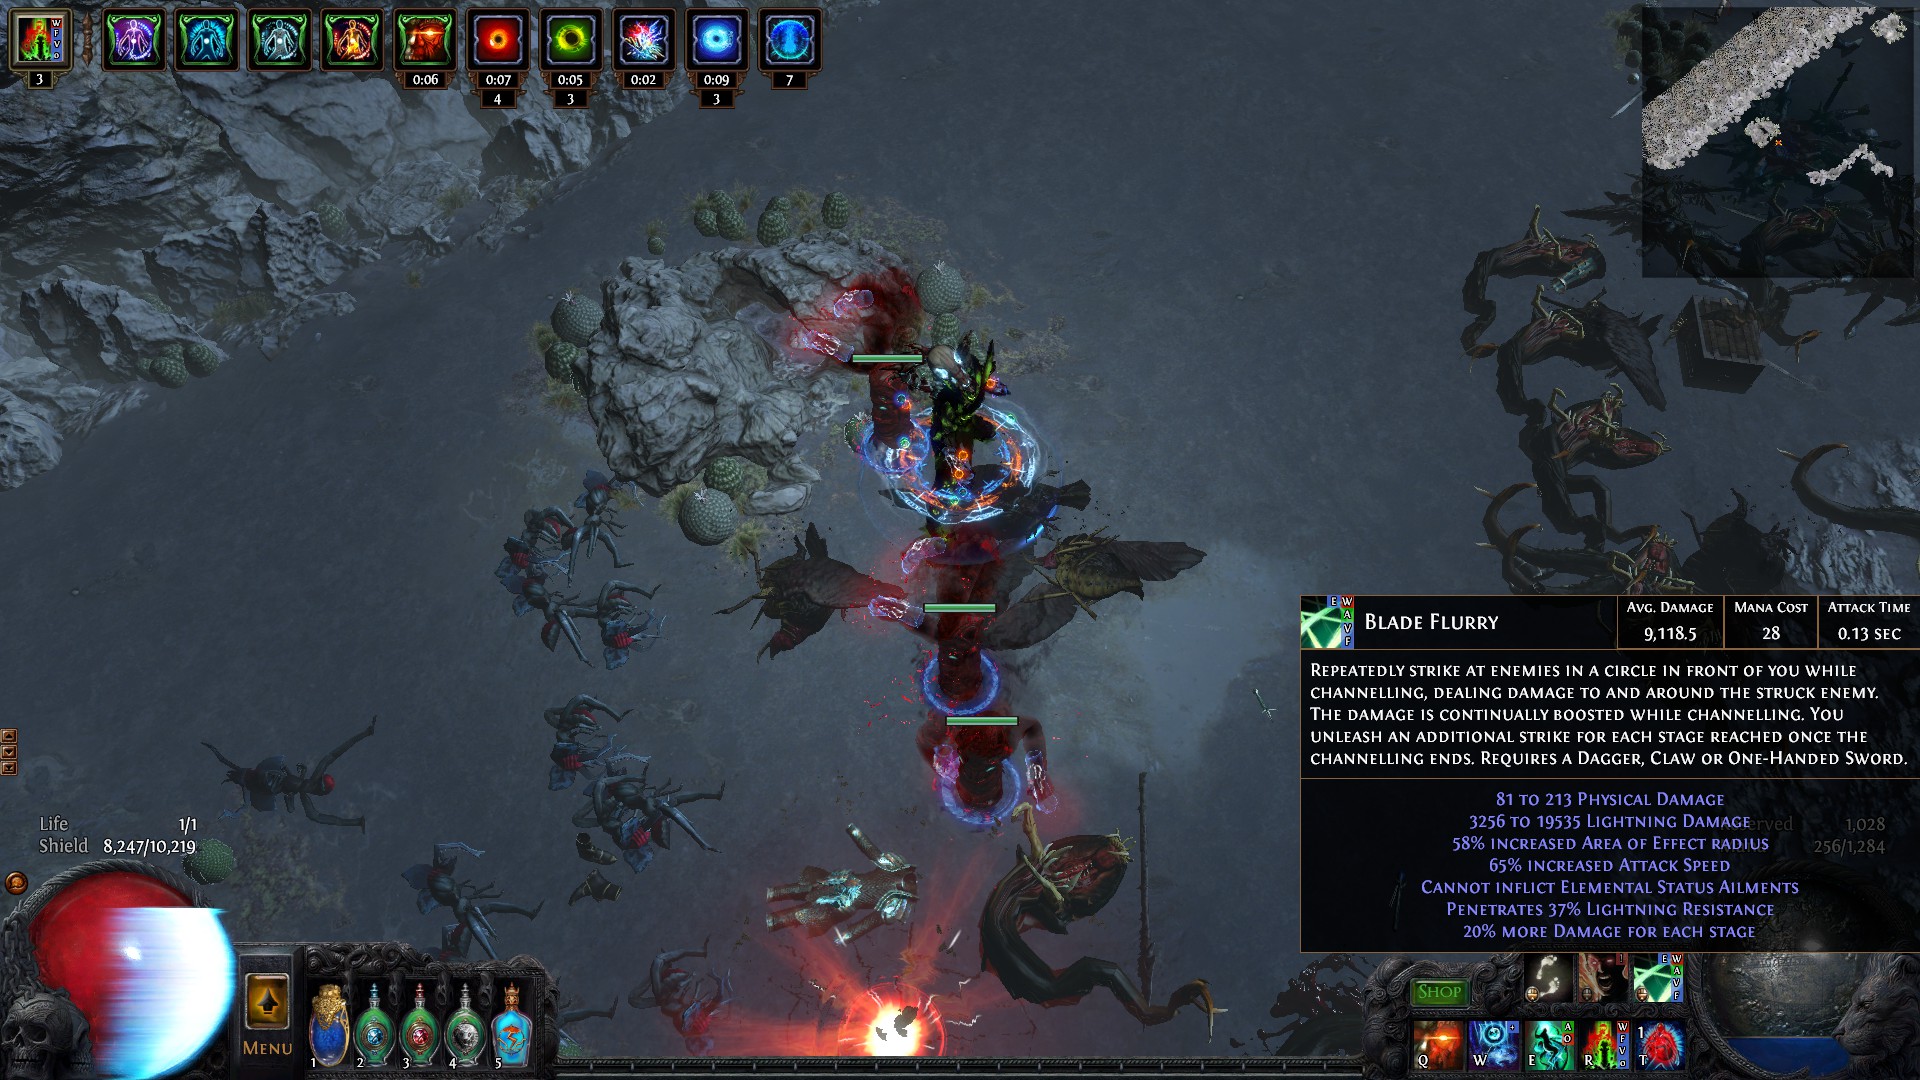 67k totem DPS 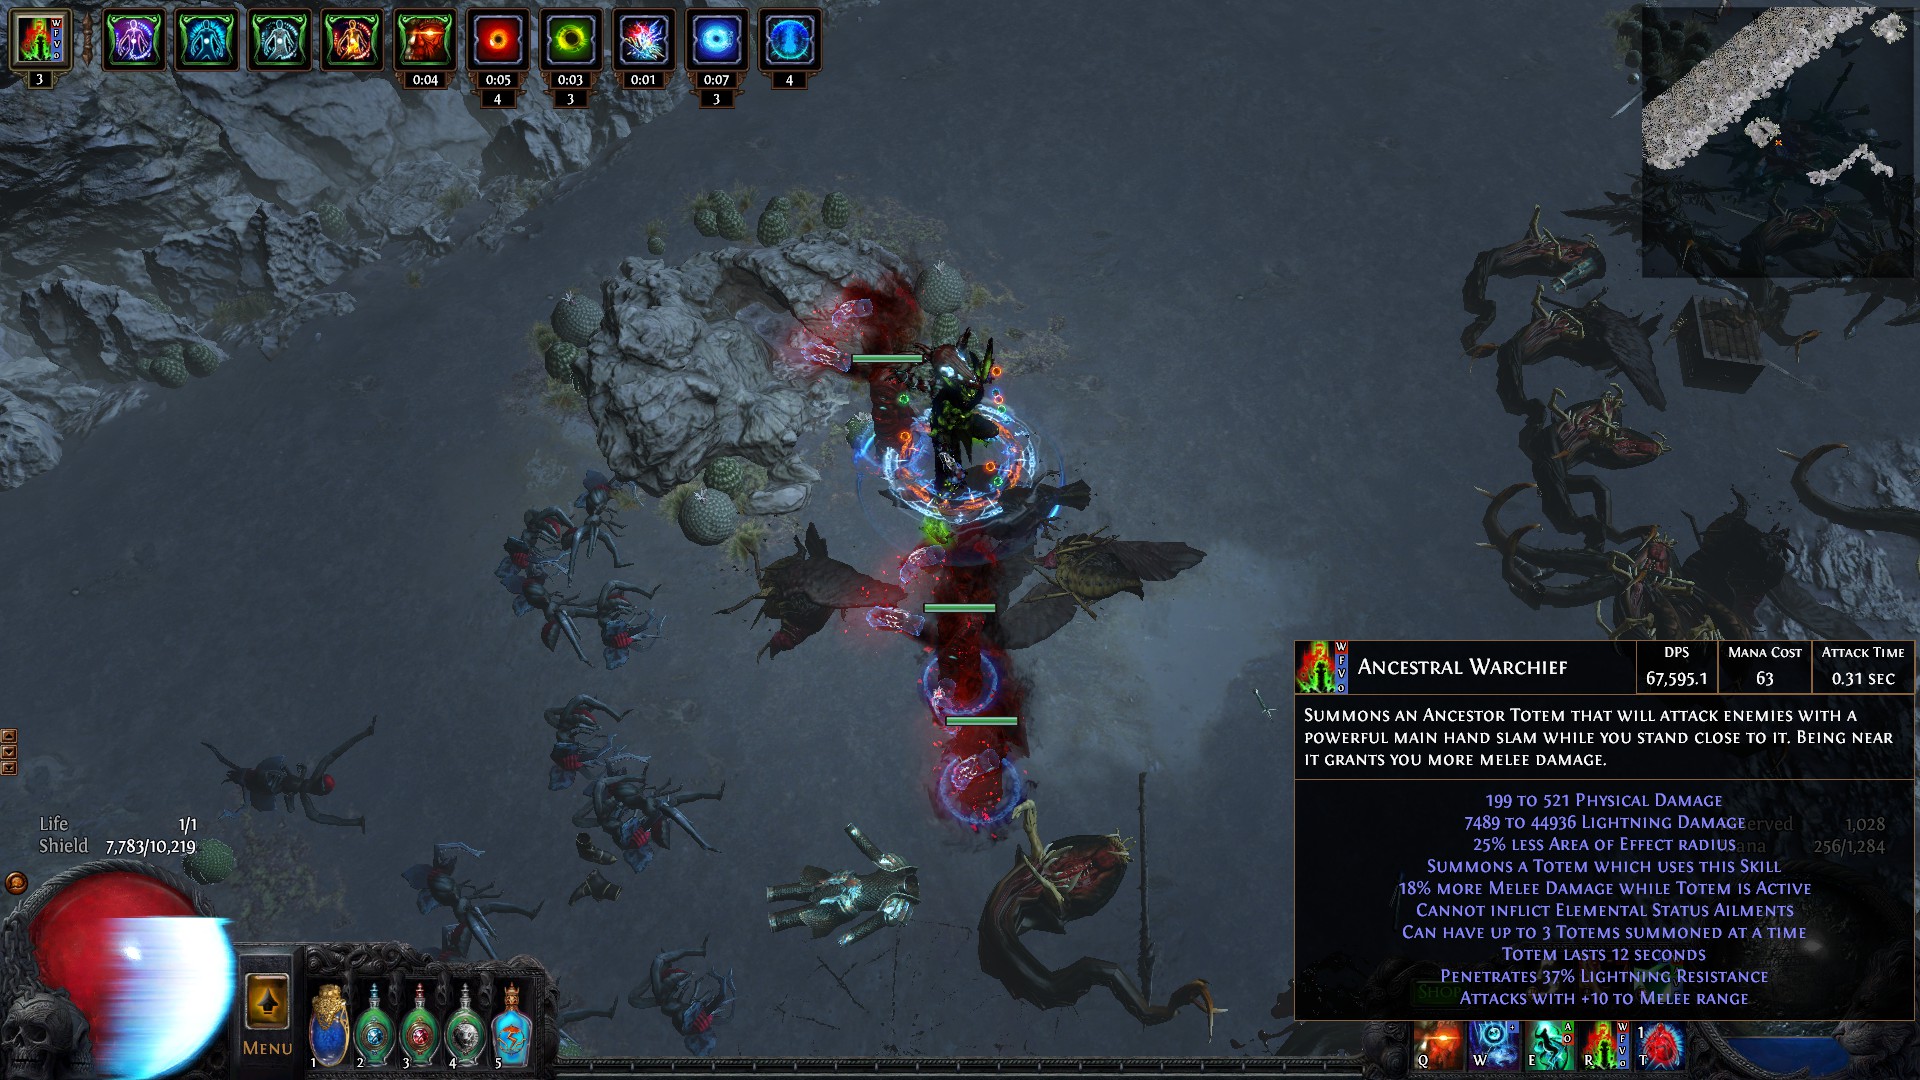 Defenses with flasks ________________
Spoiler
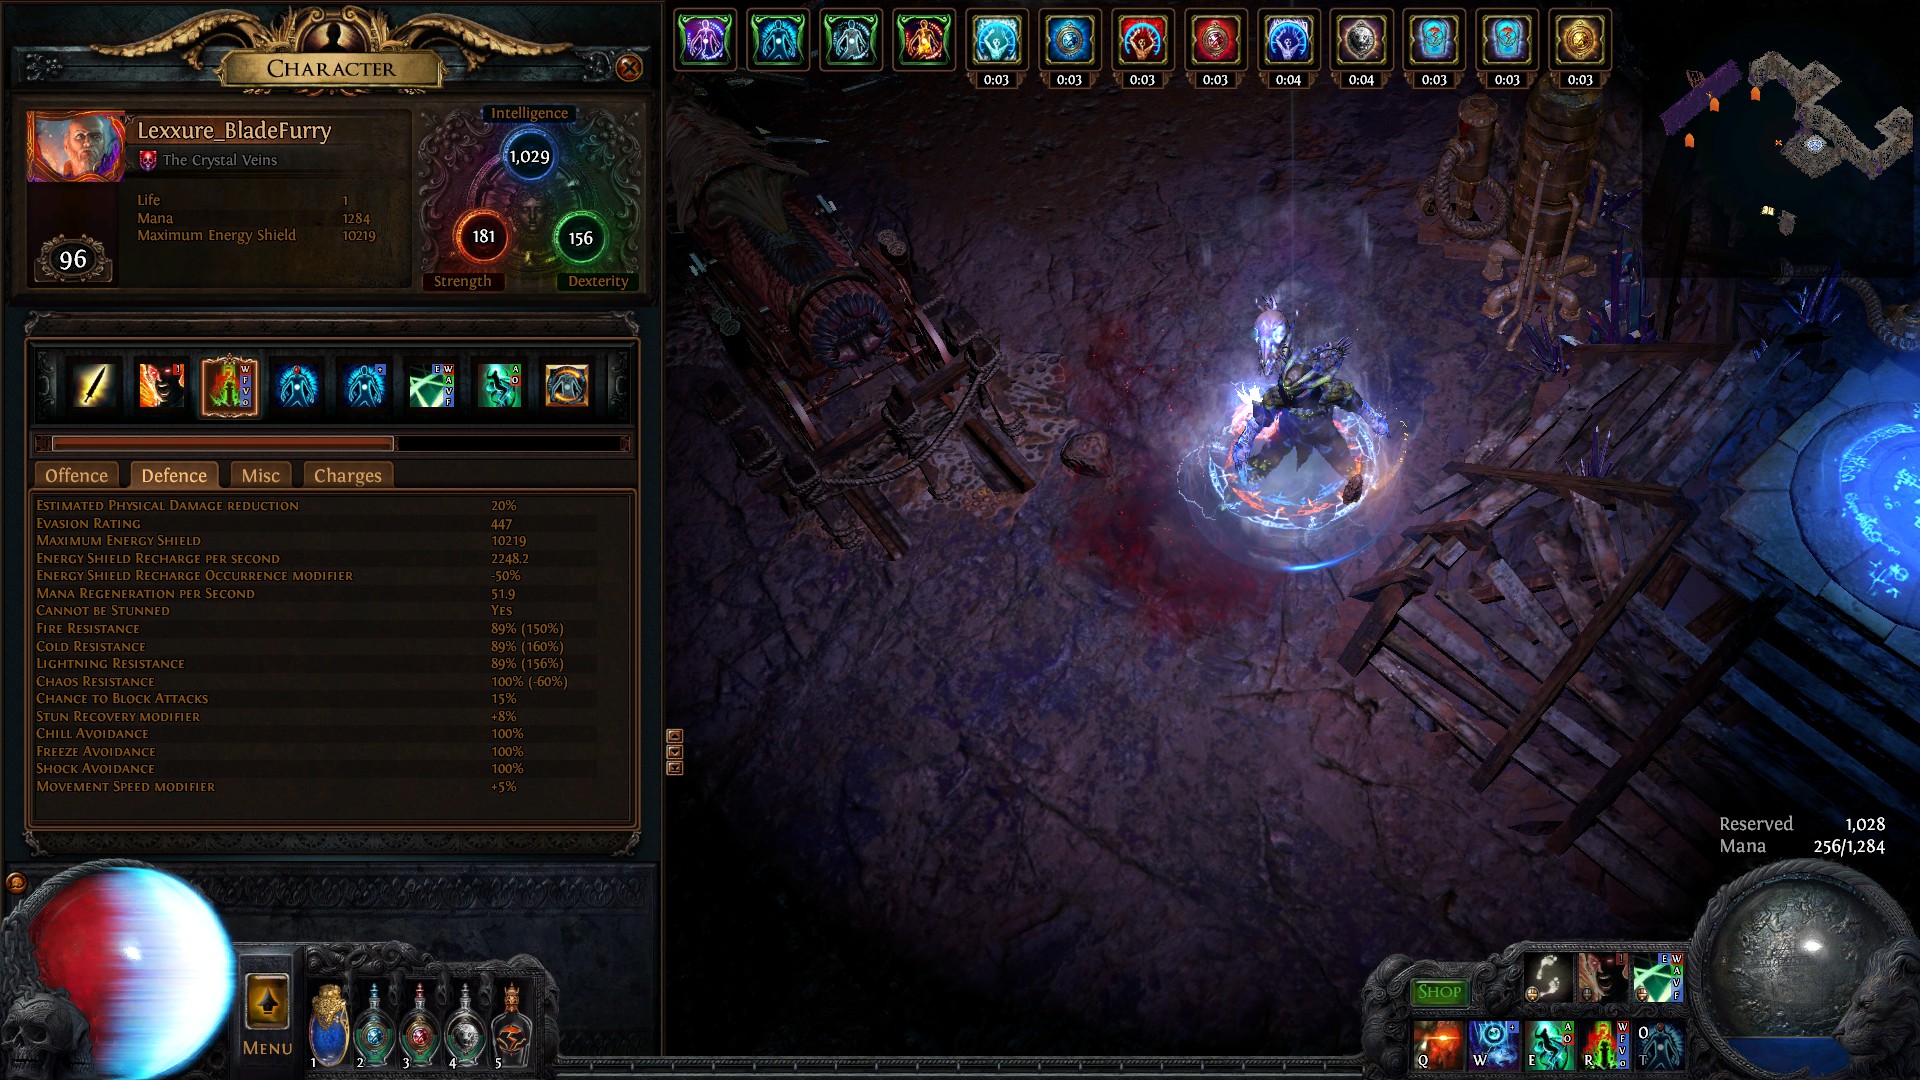 Videos: Shaper, second attempt. Make sure to bring a driftwood scepter you got on the beach to cull with, and glacial hammer for maximum pleasure. https://www.youtube.com/watch?v=57D_9Fpiqwc Uber atziri, deathless https://www.youtube.com/watch?v=XcU2kDsnscE&t=9s Guardians, first time fighting all of them (mostly white maps, very few modifiers to scope the fights. Also I had to look up how to deal with Chimera XD) https://www.youtube.com/watch?v=tigziodcbdU Hall of the Grandmasters, deathless (portals were used, and some gem finagling). Bring a block reduction gem just in case. https://www.youtube.com/watch?v=ZmTMzQEs4WM#t=1m5s Pros: -Easy to start right at level 68 with a very cheap 5 link, theoretically a six link with 20% extra elemental penetration. -Vaal Pact, Unwavering, 2% life leech and .4% mana leech. Almost constant, maxed power/endurance charges when attacking, conduit provides charges to teammates. -Three second Immortal Call on a high level CWDT gives ample time to leech back life from physical attacks. -In easier maps you can run blood rage to max your frenzy charges as well. (Not recommended in end game boss fights, but it's great for clearing). 83% all res with 10000+ energy shield with the full build. Fortify with whirling blades, flasks push you to 89% resistances, and your basalt flask pushes you to 34% phys reduction with your endurance charges (when you don't have immortal call giving you 3 seconds of physical immunity anyway). Auras benefit your totems, maxing their elemental resistances. Cons: -Unlike raider HOWA builds, you are deathly weak to freeze. You also have to provide your own shock removal to use Vinktar's safely. Maximizing the build requires a very high level and can be very costly. Some of the gear for this build might not even exist on poe.trade, so you may have to supplement resists on your jewels to compensate. -Uber lab is hell, finding someone with a 20% purity reduction Mind Cage is like Uber hell. And then if it isn't a Rime Gaze, you have to scour and chance it yourself (mine took 250 scour/chance orbs to do). -To max out the build you need a corrupted +1 gem Voidbringer with RGBB. Sometimes requires a mana flask. -Totems take a second before they start attacking, and have no physical resistance. -You struggle for gem slots, you may wish to use an unset ring. -Requires 66% aura effectiveness instead of 60% due to a bug to get your final 1% max res, see thread here https://www.pathofexile.com/forum/view-thread/1808951 -Starting out, you'll need to take several +30 str/dex nodes, and later search for gear to get 155 str and 155 dex in total. +28 all attributes on an amulet and the % dex from the claws gets me this, but you may need more depending on the rolls of your HOWA claws. -You need two, level three Enlighten gems in the final build, but their cost has gone significantly down compared to past leagues Gear:
Spoiler
Chest: Intelligence, ES, resists
Boots: Intelligence, ES, resists (avoid movement speed, it'll ironically slow down the rest of your build with its added cost) Amulet: Intelligence, all attributes, a resist if you can get it. Elemental damage with weapons, maximum % energy shield. Belt: Intelligence (requires an Essense to get this on a belt. Crystal belt base is the best to use, you will want resists here. Elemental damage with weapons is good if you can get it, or craft it on if a prefix is available. These tend to get very costly unfortunately, and this was my largest expense in the build. A dual resist regular belt will work in its place before you get a suitable upgrade. Ring: Intelligence, a resist if you can get it, mana regen if you can get it (probably not necessary before Voidbringer). Elemental damage with weapons, and make sure you check the affixes when selecting a ring to make sure it can roll % increased maximum energy shield as a prefix. Jewels You will want four stat jewels, preferably a dual resist or tri resist if you're struggling to overcap your resists. If you can, shoot for the following stats: Attack speed with Claws (8% max) Lightning Damage (16% max) Area Damage (12% max? I forget) Damage (10% max) Attack Speed with One Handed Weapons (4-6%) Attack Speed while Dual Wielding (4-6%) Totem Damage (16% max) Attack Speed You can also find jewels with dual resists as well as tri resist (totaling upwards of 54% resists total in two suffixes), which can tremendously help your gearing if you can't overcap with just your gear. (I will add my own jewels later, the site's bugging out for me). About the uniques. _____________
Spoiler
Hand of Wisdom and Action:
Spoiler
HOWA or Hand of Wisdom and Action, is the new unique Esh claw in the Breach League. These claws scale lightning damage based on our intelligence, similar to a Whispering Ice build, but it gives us the freedom to choose any of the claw attack skills. We dual wield the claws to double the damage bonus it provides. Intelligence also gives us % max energy shield, making us more tanky and able to survive the toughest content in the game. Rime Gaze:
Spoiler
This helmet is an odd one, and its negative can be difficult to adjust to--we have a much slower recharge of our energy shield as a result of this item. While 200 ES isn't much to write home about either, this helmet provides us with a level 15 conc effect, giving us a 50% more multiplier to our totems. In the helmet slot using the Hierophant's Illuminated Devotion, we also gain 20% elemental resistance, and with Vinktar's running we have 75% lightning penetration with our totems. Romira's Banquet:
Spoiler
This ring gives us a power charge any time we fail to crit on a target. Since we have a low crit chance, this generates us a constant stream of power charges, which we give to teammates via conduit. More importantly, we use Hierophant's Conviction of Power to give us a 25% chance to gain an endurance charge when we gain a power charge. With a max level CWDT and Immortal Call, this grants us nearly three seconds of physical immunity, which gives us plenty of time to negate the damage from Blood Rage, bleeds, and anything else physical in the game, while allowing us ample time to max out our endurance charges again and leech back energy shield. This ring also gives us mana that we need for our auras, as well as 333 accuracy, which for me is sufficient enough to proc Elemental Overload reliably. Voidbringer:
Spoiler
While these gloves don't provide much offensively towards the build, this is the only glove item with an inherent +1 to elemental gems. By corrupting it with an additional +1 to socketed gems, we can use level 21 purities and push their resistance potential to the maximum, granting +8% maximum to all resistances. As an added bonus, Hierophant's Illuminated Devotion gives this another 20% increased area radius, though I haven't checked the full range of the aura yet in party play. The downside to these gloves is tricky to overcome, increasing our mana costs by 80%. At times this makes the setup clunky to play around, even with a reduced reservation helmet enchant and mana leech, and you will probably need a mana flask while using these gloves. Flasks ___________
Spoiler
Vessel of Vinktar:
Spoiler
This flask provides lightning resistance, massive leech, and a powerful shock to nearby enemies. One of your flasks will need to run shock removal in order to run this, and you need to always hit that flask first before activating this. I think the 10% lightning penetration variant is the best choice for this flask. Mana flask of Heat:
Spoiler
I like Surgeon's, just so I can theoretically have a chance to restore its charges in a long boss fight. It probably isn't necessary to have that prefix in most situations though. Heat is good though, you need freeze removal. Ample Sapphire Flask of Heat:
Spoiler
More freeze removal, +6% max res, extra charges. Ample Ruby Flask of Staunching: Unless you're fighting Atziri or the Trio, this should be all you need to deal with bleeds. You may need to occasionally swap your mana flask to a staunching for certain bosses with bleed, but this has gotten me through the game pretty reliably. I've only died once to a bleed this league during the trio, and it was more because I was playing terribly than anything else. Bear in mind that CWDT does not trigger from bleeds, but if it procs from another hit when you have max endurance charges, you will be immune to physical damage (and bleeds) for that three second duration. Since bleeds last 5 seconds, you'll have plenty of time to catch it in the majority of situations. Chemist's Basalt Flask of Grounding: You need at least one grounding flask to remove shock. You still have to take damage to activate Immortal Call, and this gives some extra reassurance that you will stay standing. Do not use this flask unless it has 30 charges per use, as you'll only have one use available during boss fights before you need to gain charges somehow. Gems:
Spoiler
Chest: RGGBBB Blade Flurry | weapon elemental damage | elemental focus | lightning penetration | increased area of effect | faster attacks
Spoiler
Thankfully it's very simple to get three off color on our chest piece using Vorici. I think faster attacks is the best choice on the sixth gem, otherwise added lightning damage may be superior. Increased AOE expands our range nearly to the end of the screen.
Helm: RRBB Ancestral Warchief | weapon elemental damage | elemental focus | lightning penetration HOWA1: RGG Whirling Blades | faster attacks | fortify HOWA2: RR, and an unlinked G Immortal Call | cast when damage taken | Blood Rage
Spoiler
Keep Blood Rage separate with this setup, otherwise it will interfere with your Immortal Call proc. I do not recommend linking CWDT with anything except IC just to ensure that we always can have it activate once the cooldown expires. Having Blood Rage in our claws allows us to weapon swap to remove the buff between packs, as the degen damage can be a bit of a pain if you aren't leeching. In combat and while leeching, the damage you take from it is hardly noticeable. When fighting the hardest boss fights, you probably want to leave this off.
Gloves: RGBB Purity of Ice | Purity of Fire | Purity of Lightning | enlighten
Spoiler
With a corrupted +1 to gems Voidbringer and level 21 purity gems, this boosts us to 8% max res. Enlighten gains a level too which is nice, and we gain 20% AOE to help it reach farther to teammates. Boots: At least two blue, then your choice. Discipline | enlighten
Spoiler
You need to at least use Discipline and Enlighten here. For my other gems, I use Lightning Warp, because sometimes I struggle moving past little bits of terrain here and there, and it's easier for me to warp over the obstruction rather than path around it. Also it's useful to be able to jump gaps, or charge up your blade flurry to the max right before you land to put out a large spike of damage on a target. Vaal Discipline is another choice here, and if you want you can use it with Increased Duration in this position. Right now I sometimes use Clarity in this position, while using Vaal Discipline on an unset ring. Rallying Cry and Frost Wall would be powerful choices here as well, especially Rallying Cry because taunting enemies reduces the damage allies take by 10%, further helping them stay alive, while giving the whole party some extra damage. Passive Tree and leveling:
Spoiler
Bandits: Kill, kill, then help Oak for the Endurance Charge in Merciless. Ascendancy priority Choose Pursuit of Faith > Ritual of Awakening > Illuminated Devotion > Conviction of Power, in that order. Level 68 tree (use blasphemy/warlord's mark to start) Remember for your gear that to finalize the build you need 155 str/dex, and you need at least 131 dex for the claws themselves. You need one Brute Force Solution in the lower left jewel slot, and one Fertile Mind in the right side jewel slot. Level 85 tree Remove warlord's mark. Before purities. You need a second Brute Force Solution now at the bottom of the tree. Level 88 Less % ES on tree, more gear dependent. With Romira's, but before Voidbringer, +6% purities, you need two level three enlightens. Ending level 96 tree More jewels, only remove the start of templar if you have 4 stat jewels. This is with the helmet enchant also for 20% reduced purity of fire reservation. Purity of Ice and Lightning work too, as well as Discipline.
Spoiler
https://www.pathofexile.com/passive-skill-tree/AAAABAUCAAHnBFELYQ18EVARlhXXFy8YXRkuGYoZ1xpVGo8c3B0UHaoi9CPTJLAnCyftKPoqOCy_LlMvbzLRNbk26DdHOhY8BTwtPO89X0MxRUdGaUZxTP9OKlJTVkhWY1cNV8lYbVv0X2pfsGBDYSFhUmQzaFpoZWjya6xsC20Zbj1vJ2-ecLt_xoCkgwmDX4O2hMWE74ZghoKGrobRjxqPRo9gj_qTJ5OVl_Saapu1ns2fy6EvpwinK6cwrTOt8a79r2y0DLiTvoC-isBmwcXDOsT2xq7KSsrT0NDSIdNv2CTZE9lh2sHhiOq66-7sGOwu707vfPOb9tr53frS-wn-SQ==?accountName=Lexxure&characterName=Lexxure_BladeFurry http://www.poeplanner.com/AAQAAPEFMAB2-d3AZq3xGF0872jyr2wLYcauxPbEFSftGS7ZYVcN85toZdIhns2nMJ_LPAXvfEVHMtHr7qcIj0ZSUz1fl_RtGRFQNbmnKyL0bAuTJ3_GwcXsGCy_FdeGrlZjvoqhL8rTtAzqug18RnGDCW-eykpfsJu1wzqExSo4PC2DXwHnNugaVWEhhO_awUMxTP9OKiPTbyeaao9gLlPTbx0U-tIXL4CkcLvZEy9v4Ygdqv5JGYr7CfbaGo8c3I8auJMo-lfJJLBb9GBDbj2-gDdHa6yGYGFS706G0ScLg7YRlpOVrTMZ19gkVkiP-tDQX2oAABYBAAAiAAIAB9ABBRQBBAMMDQ4BAQADAAA= Early game
Spoiler
1-68, you have to either play as something else or find some decent elemental damage weapons. I was lucky to find some decent swords with elemental damage around level 28 when blade flurry was available, then leveled with them and a few upgrades all the way until level 68. If you can get help with the cruel/normal labs, do them as soon as you can to get your extra totems and warchief, as this helps smooth out the leveling process significantly. Alternatively, just use a +1 gem scepters and your spell of choice. Freezing Pulse to level 28, then switch to Firestorm, or use Flame Blast totems with Ancestral Bond. I leveled with roughly the same build as what I used in end game, taking life nodes along the path instead of ES, then switching to CI at level 68 when I could equip the claws.
Early gearing is much simpler before Romira's/Voidbringer because you can use those slots to get more resists, and upgrade your other gear later. Make sure to get around 40 int on every item, ignore movement speed on boots as we use Whirling Blades to move around. You can usually buy tri-resist belt rather cheaply if you're struggling with resists early, then move towards a crystal belt later on. Before your five link, you have the choice of putting your blade flurry in any of your other slots to gain its benefit. I suggest running warlord's mark and blasphemy to maintain mana early on, but be warned that you will have to carefully watch map mods for Hexproof (I'm looking at you, Zana!). I ran blade flurry on my helmet at the beginning to maximize its damage, but I question if that's the right choice--using it with conc effect significantly reduces the range and makes it feel (ironically) much more like a melee skill. You could opt to put blade flurry in your gloves at an early level to gain a bit of a range increase, or use it in your gloves for the 2% leech, then just spam a mana flask to maintain mana. Dealing with reflect:
Spoiler
Early on, you should be wary of reflect mobs, especially if they are hexproof and you can't leech from them with Warlord's Mark. Later on with 83% lightning resistance, they don't tend to be too much of a threat, but always be watchful of your ES anyways just to be sure. Vinktar's helps significantly with this and makes it all negligible, but this won't be available all the time for reflect maps. This build can run ele reflect maps but you will need to swap weapon elemental damage for a life leech gem. If the map has -max player resistances, you will need to swap your mana flask for a second topaz, and constantly run it. Before you get purity of lightning, your totems will die instantly to reflect maps, and even with the purities they won't last very long, so be wary of this, especially against bosses. Breaches will be an almost certain death early on if you're running a reflect map, since you need your totems to help your damage in those early levels.
Here is an example, a bad one (pardon my death, I was tired while doing this and I don't even know what that essense was XD be cautious not to face tank like that if you're taking significant damage), but it should show how to deal with reflect at the highest levels. Also if you're in an elemental weakness map, make sure you're overcapped in the zone. https://www.youtube.com/watch?v=nucd1yhv1-Q#t=2m30s The map mods
Spoiler
 Last edited by Lexxure#4610 on Jan 9, 2017, 2:50:55 AM Last bumped on Jan 9, 2017, 2:42:50 AM
|
|


