


[3.2] Blade Flurry Juggernaut - Dedicated Uber Labyrinth Runner for HC
|
Hello everyone!
I wanted to create a cheap league starter character for the sole purpose of farming the labyrinth in HC. This build is the result of that desire. Before we delve into the actual build, keep in mind that it was not created for end game maps or bosses (guardians, shaper etc). It can be used for maps and it excels at physical damage fights (like Uul-Netol or Minotaur), but it requires some changes to gear and links. 3.2 Information Hello everyone! The build is still viable and has been buffed with the ascendancy rework to deal more damage and gain even more survivability. The order for the Ascendancy nodes are the following depending on gear choices or if budget or non-budget: A. Not using Kaom's Roots (unique boots) Unflinching -> Unrelenting -> Unbreakable -> Unstoppable B. Using Kaom's Roots (non-crit, budget version) Unflinching -> Unrelenting -> Unbreakable -> Unyielding C. Using Kaom's Roots (crit version, expensive version) Unflinching -> Unrelenting -> Unbreakable -> Undeniable With the introduction of Abyss in 3.1, you can prioritize jewel slots on the tree for flat maximum life, flat physical damage to attacks/swords and strength. Ruthless can no longer be used with Blade Flurry and should be replaced with Damage on Full Life. Introduction The Blade Flurry Juggernaut makes for a very easy to gear, level and scale league start character. The build revolves around using Doon Cuebiyari in the main hand, to make use of the 1% increased Damage per 8 Strength bonus that it provides. As a result, stacking strength is good both for defense and offense, as it provides 1 life per 2 strength and 1% melee physical damage per 5 strength. Blade flurry was chosen as the main skill due to several reasons: 20% more damage per stage (maximum of 6 stages) and more damage when releasing the stacks Small AoE (very useful when farming lab and not wanting to accidently kill an essence, gargoyle or lieutenant early on when damage is lacking) Only uses daggers, claws or swords, making it perfect to use Doon as a statstick in the main hand You can find me streaming this build (and others) at https://www.twitch.tv/pressstarttopaws.
Pros/Cons
Pros + Budget/Starter + Can facetank most Izaro phases (with minimum investment) + Beginner friendly + Easy time with traps (life regeneration and endurance charges make it a lot easier) + Easy to gear Cons - Easy time with traps (going on a VP character in lab afterwards feels so squishy) - Requires attention to buffs (endurance charges maintained & keeping fortify up) - Makes you enjoy lab a little bit more
Leveling
I started Harbinger HC with this build day 1, had no gear, no uniques etc and no knowledge of what the act 9 and 10 bosses do. The character is still alive and honestly, it was a very safe and tanky experience to level up with. I do not recommend to level with Blade Flurry as it feels slower than Sunder. I used Sunder to map with etc until I was ready to enter the Uber Labyrinth. As you start out, you can use Onslaught to really speed up your experience, as well as Chance to Bleed and Ruthless to boost your damage early on. Use Cleave until Sunder is available. If you have access to uniques, Screaming Eagle (level 6) and their upgraded prophecy version The Gryphon (level 32) provide movement speed and good damage. If you do not have access to uniques, you can use the vendor recipe to upgrade weapons for yourself. The recipe is 1 whetstone, 1 blue or rare rustic sash and the weapon base. It results in a %physical damage blue weapon. Once you obtain a Silver Flask (minimum level required is 22), you can drop Onslaught from your main links and go with the following: Sunder - Melee Physical - Maim - Added Fire or Sunder - Melee Phys - Faster Attacks - Added Fire / Maim At level 38, you can replace Added Fire with Multistrike. If you are using a Tabula, you can not drop Onslaught as it is nice to not bother with a Silver Flask and use all the above mentioned gems. Leveling Trees: 13 points 24 points 34 points 59 points Can always invest into specific nodes for weapons you are using and respecc out of them later if you feel you need damage. Likewise, can take diamond skin if you need resists. 83 points 93 points From here, you can respecc out of the leveling nodes that connect Barbarism and Strong Arm and once you are ready for Uber Lab, take the sword nodes: 97 points
Final tree
When to make the switch to Blade Flurry
I recommend swapping to Blade Flurry when starting to do the Eternal (Uber) Labyrinth. Before that, Sunder feels like a better choice to map with and/or level with. Anywhere between level 74-80 is OK to swap to as long as the character has over 5.2k health and the majority of the defenses presented below. This will allow for easy farming of Portals, Fonts, Idols, Lieutenants. For the rest of the Izaro phases, more life is recommended or not facetanking things like Izaro's slam.
Path of Building
You can download PoB from here. To access the link to the build, press New => Import/Export Build => Import from Pastebin => Copy the link => Import => Import PoB link: https://pastebin.com/y6xVrTJg
Bandits
For this build, I killed all bandits for +2 skill points. I do not think Oak is better than a jewel. The following section explains in-depth the defense and offense of the build.
Defense
Let's take a more indepth look at what defenses this build has and what must be done to ensure staying alive against Izaro and his puppy, Argus. 1. Endurance Charges Each endurance charge provides us with 4% physical damage reduction (default), 0.2% of maximum life regenerated per second (node on tree) and 6% increased damage (from the Unrelenting ascendancy node of the Juggernaut). While at maximum endurance charges, the character is also granted 8% reduced elemental damage taken. Due to this, is it very important to keep a track of endurance charges and keep them up at all times. Using Enduring Cry on monsters before going into a more complex set of traps helps mitigate the incoming damage taken and lets us sit on fire or take damage without having to use multiple life flasks. Likewise, Enduring Cry is used to reach the maximum number of charges before going in to tank Argus or Izaro when he is buffed. 2. Fortify Fortify is a buff that is applied when whirling through a target or leaping onto a target. In most cases, it is obtained by using Whirling Blades through Izaro every 6 seconds. Because the ascendancy choice is Juggernaut, the fortify effect is more powerful on this build, providing 25% reduced damage taken instead of 20%. The ascendancy node 'Unyielding' provides a 30% increase to damage, as well as 1.5% of maximum life regenerated per second while Fortify is up. It is imporant to remember to refresh and keep this buff up at all times when buffing Izaro as it greatly reduced damage taken from all sources. 3. Flasks Having good rolled flasks can help boost defenses by a great margin, as well as make the fights easier. Depending on the labyrinth day, the setup is changed to minimize damage taken. I will go through all the flasks recommended for this build. Keep in mind that because this is a budget guide, I did not consider the more expensive versions of the flasks here. Flasks used at all times: Atziri's Promise (used for leech and extra damage) Seething Divine Life Flask (Instant recovery life flask) Chemist's Basalt Flask or Ample Basalt Flask (this flask requires a good enough 'Chemist' roll so that it can be used twice during combat or a +20 ample roll) Flasks that change depending on Izaro phases: Granite Flask (useful for charge disruptor and gargoyle encounters) - reduces part of the physical damage taken, has 2 uses by default. Topaz Flask (useful for conduits, elemental essences, idols and lieutenants encounters ) - reduces part of the elemental damage dealt during elemental days, can be paired with a second elemental flask (sapphire) Quicksilver Flask (useful for some trap layouts where whirling/leaping is more dangerous than running, optional swap as it doesn't provide any help during the Izaro fight itself) Suffixes for flasks: The suffix 'of Staunching' is mandatory, should be used on a utility flask with 2 charges. The removal and immunity to bleed helps a lot during the long spike traps and tends to be used often during every lab run, regardless of day. The suffix 'of Warding' is used when Izaro has the 'Fonts' encounter, to remove vulnerability and elemental weakness during the encounter. The flask must be on 2 uses at least, especially if Izaro was previously buffed. The suffix 'of Grounding' is useful to have for any encounter that has elemental damage (described above) as you do not want any kind of shock on you. Must have at least 2 uses and should be used on a utility flask. The suffix 'of Iron Skin' provides a boost to our character's armor, reducing damage taken from smaller hits. Because armor is not as effective against big hits, this is more for quality of life and not mandatory. The suffix 'of Curing' can be used on a life flask for open layout days with a lot of poison darts. I personally do not use it, but can help if running multiple people and pressure plates trigger. I did not include 'of Heat' for freeze removal as it is not relevant as long as the 'Unstoppable' ascendancy passive skill is taken. Use this suffix until then. Once the passive is allocated, the character will be completely unaffected by Chill, Freeze, or Temporal Chains. 4. Enfeeble Having Enfeeble on Cast When Damage Taken provides an additional layer of defense against damage taken, as well as reducing the chance to take a critical hit. Depending on the setup, enfeeble can provide ~25% less damage and reduce the chance of a critical hit by 30% against Argus. Izaro is considered a boss and curses are 60% less effective. 5. Totem & Golem The Ancestral Warchief (or Protector if IAS is needed) is linked with Maim, Culling Strike and Blind. Maim reduces the movement speed of the affected target by 30%. Blind lessens the chance to hit of the affected target by 50%, making it a decent option, especially for fast hitting attacks. Culling Strike kills any enemy that has 10% or less life, reducing the time spent on Izaro while he is fully buffed in the final encounter. The Stone Golem provides 105 life regenerated per second at level 20 and has an AoE ground slam that taunts. Should always resummon the golem as it is a noticeable difference during traps and fights. The taunt will reduce damage taken in some scenarios (like Argus). Keep in mind that when fighting Idols, you need to stay away from them while the golem is up and/or attack Izaro once so the golem focuses on Izaro and does not prevent the Idol from fully charging (which will result in losing a key or prolonged fight to fully buff). 6. Belt of the Deceiver This belt is very good to boost both damage and defense. The belt provides strength and life, increasing the maximum life pool (can be corrupted for +1 endurance charge) and reduces extra damage taken from critical strikes by 30%. 7. Life & Life Regeneration While this one is pretty obvious, the character relies mostly on life regeneration to survive and a high enough life pool to survive getting 1-shot. Generally, you do not want to buff Izaro with the harder mods until having 6-8k life at least (for charges, essences, conduits, gargoyles). The 8k life requirement is for buffing double elemental damage Izaro, as that one is the one this build struggles the most with. Keep in mind that the values given are based on hundreds of runs and account for the chance of getting critical hit. Argus usually deals damage a lot faster than Izaro, but is easily distracted by the totem/golem. You can whirl through him if the regen/leech does not feel sufficient early on. Keep in mind that Argus can critical hit for over 6.5k life if no endurance charges are up, so make sure to avoid his sunder attack if at 0.
Pantheon
Minor Gods Soul of Tukohama (minor) provides up to 8% physical damage reduction while standing still. If upgraded, it also provides up to 2% life regeneration, making it a good choice when facetanking Izaro. This is the minor one that I personally use. Soul of Ralakesh (minor) reduces damage taken from bleed, which can be useful if leaping/whirling through a lot of spike traps. Sometimes the character is not stopped in the spikes, but receives the bleed and keeps moving. In such scenario, this minor pantheon can help. Major Gods The Soul of Lunaris can be useful when doing Izaro phases that involve extra monsters (gargoyle, lieutenants etc) to reduce physical damage further. The Soul of Solaris can be useful when doing Izaro phases that do not involve extra monsters, but because Izaro summons extra monsters, it is harder to keep up. Capturing the dungeon map bonus further reduces elemental damage taken if none was taken before. The Soul of the Brine King can be taken when having lower life to prevent stuns, but it is not often required.
Offense
Staying alive is important, but so is killing Izaro before our flasks run out. As I said at the start of this guide, this build uses Doon Cuebiyari in the main hand and is stacking strength from tree and gear. This allows us to take a lot more defensive nodes on the tree while still having decent damage to kill Izaro relatively fast on a cheap budget / at league start. Because this build is Resolute Technique (RT), we never deal critical hits and our attacks can't be evaded, so accuracy is not an issue. Blade Flurry can use either claws, swords or daggers. The reason I picked swords over claws (more leech) and daggers (crit) is because of the position of the specific weapon nodes on the tree. The required level would be higher to have similar damage or the entry weapon would be more expensive. As such, the sword cluster provides enough damage with no travel required and a few cheap unique options exist (like Ichimonji). One of the most important aspects when it comes to damage is how Blade Flurry works and how it scales. The tooltip of the skill does not show the actual DPS. Blade Flurry is a channeled skill that has 6 stages and can be released to deal more damage. Reaching the '6 stack' and releasing provides the most DPS. To reach 6 stacks faster, increased attack speed is a very important stat to obtain until the skill has 6+ APS. For this reason, I opted to go for dual wield as it provides 10% more attack speed and 20% more attack physical damage. Due to pathing, Berserking and Duality nodes provide a huge increase to IAS and damage as well. Keep in mind that releasing Blade Flurry at 6 stacks against reflect can kill you once DPS goes over 100k, especially if defenses are not up. This build uses a physical sword with high attack speed (example in the gear section) and can further scale the damage from flat physical damage on the gear. The auras are also used to boost offense. Hatred provides up to 36% of physical damage as extra cold damage and Herald of Ash provides 15% of the physical damage as extra fire damage. The Juggernaut ascendancy also provides a damage boost per endurance charge (6%) and 30% increased damage while Fortify is active, as well as 24% attack damage from the minor nodes. The damage is further scaled by having the Maim support gem linked to the totem, causing enemies to take 14% increased physical damage from our attacks. The 'Belt of the Deceiver' belt intimidates nearby enemies, causing them to take 10% increased damage. Finally, the Atziri's Promise flask provides extra chaos damage during the flask effect.
Ascendancy
I opted for the Juggernaut ascendancy of the Marauder because it provides a lot of defense and some offense, making it a good choice for labyrinth especially early on in the league. The following order from Normal to Uber Lab: Unflinching => Unrelenting => Unyielding => Unstoppable I did not pick Undeniable because the build is Resolute Technique (RT) and does not need accuracy. Personally I prefer to go for Unstoppable as it allows us to drop the anti-freeze flask, as well as not be affected by the temporal chain fonts present throughout the labyrinth, making traps a lot easier to deal with. The Unyielding node provides damage, life regeneration and 5% decreased damage taken (not just physical). As such, I prefer it over the Unbreakable node which offers ~6% physical damage reduction.
Links
Links Blade Flurry - Melee Physical Damage - Concentrated Effect - Maim Blade Flurry - Melee Physical Damage - Concentrated Effect - Maim - Chance to Bleed Blade Flurry - Melee Physical Damage - Concentrated Effect - Damage on Full Life - Chance to Bleed - Maim Ancestral Warchief - Maim - Culling Strike - Blind If the attack rate of Blade Flurry is under 6, use Ancestral Protector. Otherwise stick to the Ancestral Warchief. To check the attack rate, just open the character, select offense and blade flurry and check the 'Attacks per Second' section. Cast when Damage Taken (level 5) - Enfeeble (level 8) - Vortex (level 8) Keep in mind that the level of the CWDT setup can be higher or lower, depending on the frequency at which you want the curse applied. Vortex is an optional link, it is mostly used to chill enemies. Whirling Blades - Faster Attacks - Fortify - Leap Slam Leap Slam can be useful for certain trap layouts and to skip sections in the open layout labyrinth days. The remaining gems do not need to be linked with anything: Auras: Hatred, Herald of Ash Golem: Summon Stone Golem Warcry: Enduring Cry (to be used to gain and maintain endurance charges) Can also use Blood Rage during the Izaro phases for Frenzy charge generation, increased attack speed and life leech.
Gear
Budget/Starter Version
Weapons Main Hand: Doon Cuebiyari (required unique) Off Hand: Unique starter option: Ichimonji is a good starter unique weapon if a rare one is too expensive. It is a 250-260 pdps with high APS. The sword also provides some extra defense by buffing the fortify effect. Rare weapon: There are two important stats to take into account when looking for a rare sword. High APS (as it helps reach 6 stacks on flurry faster) and the physical DPS. I recommend as a starter weapon anything that has 1.7-1.8 APS and 250+ pDPS. Here is a search example for weapons: http://poe.trade/search/huitosesimakin Crafting bases: Corsair Sword - 77.5 base DPS with 1.55 APS, only has 117 dexterity requirement Jewelled Foil - 73.6 base DPS with 1.6 APS, has a 212 dexterity requirement (would require dexterity on tree, jewel or gear to equip) If you wish to craft your own weapon, I recommend either using zeal essences for the guaranteed attack speed and then looking for a decent pDPS or using alterations, augments and regals. Check out Exilemods (1H Swords section) for more information on what item level is required for the %physical damage roll and the flat physical roll. Example of a budget crafted weapon (the flat physical damage was t4, crafted for the purpose of showcasing desired stats, try to get a higher flat physical damage tier or a non-crafted %physical damage): 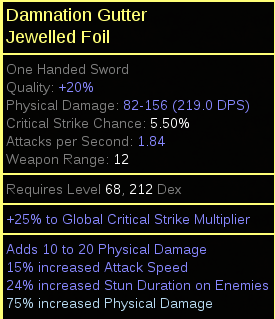 Helm The main stats that you should look for when searching for a helm are: 1. Life - higher life allows for more safety when farming full key runs 2. Resists - must be capped at all times 3. Strength - increases life and damage 4. Armor - adds another layer of defense and can mitigate smaller hits Here is a search example for a good starter helmet: http://poe.trade/search/kakimamonatusi Here is another search example for a helmet that is more specific and searches for either strength or dexterity (to help with the dexterity requirement): http://poe.trade/search/tomitinagunasi In both those links, you can sort for total life or total elemental resistance, depending on need and go from there to decide which to buy. Gloves The main stats that you should be looking for when searching for gloves are: 1. Life 2. Resists (if needed for resistance cap) 3. Strength and/or Flat Physical Damage and/or Attack Speed 4. Armor Here is a search example for starter gloves: http://poe.trade/search/otametonazugio (if resists are needed) http://poe.trade/search/bakitogebowoho (if resists are not needed) I do not recommend using any unique gloves as the bonuses received from rare gloves tend to be better when it comes to defense. Boots The following stats are important when it comes to boots: 1. Life 2. Movement Speed - some trap layouts do not allow for easy leaping/whirling blades and tend to be easier to run through, in which case MS helps a lot 3. Resists 4. Strength 5. Armor Here is a search example for starter boots: http://poe.trade/search/imomeonowaguge (remove/change the resistance search to match specific requirements as needed) Cheap uniques that can be used until rare boots: 1. Kaom's Roots - Provides stun immunity and high life at the expense of sockets on the boots, movement speed and the ability to evade enemy attacks. 2. Alberon's Warpath)- Provides a slight damage boost, chaos resistance, movement speed and an increase to strength (recommended if over 650 strength only or if no available good rare boots) Body Armour When it comes to the body armour, the most important stats are: 1. Life (can easily obtain 100-120 life on body armors) 2. Resistances (if required) 3. Strength 4. Armor Here is an example search for a starter body armour: http://poe.trade/search/amasahakasiuwo Another method to obtain a decent chest piece is to pick up an armor based body armour and use a Screaming (or higher) Greed essence to guarantee the life roll. When it comes to unique options, there are not many that can compare to a good life roll rare on a budget. I do not recommend using Carcass Jack as it's evasion based (making colors harder to obtain) and increases the AoE of the skill which can become annoying for certain phases. Belly of the Beast is usually not very cheap and it requires good life on other pieces to shine. While it is a decent option, I do not think it's worth the extra chaos compared to a rare. Gruthkul's Pelt disables spells, which removes our endurance charge generation (warcry), auras etc. Lightning Coil has a low life roll (vs 120-150 rare) and converts physical damage taken into lightning (this build has very good physical damage mitigation and is more vulnerable to elemental) Belt The best belt for this build is a unique belt - Belt of the Deceiver. It provides resistances, life, reduces damage taken and increases the damage dealt to enemies. Click here for the poe.trade search for it. Amulet The following stats are important when it comes to a rare amulet: 1. Life 2. Resistances (if required for cap) 3. Strength and/or Flat physical damage 4. Elemental damage with attacks 5. Physical attack damage leeched as life (optional) Here is a search example for a starter amulet (remove resistance search if not required): http://poe.trade/search/omakotokakonad The unique amulet Carnage Heart can be used instead of a rare amulet to provide resistances, some damage and better leech. However, I do not recommend it as a top choice over a good life roll amulet and prices have been going up on it, making it less of a budget option. Rings Rings can be used to cap resistances or further increase the damage of the build. The following stats are useful: 1. Life 2. Resistances 3. Strength and/or flat physical damage 4. Elemental damage with attacks Keep in mind that dexterity or intelligence can also be desired on rings depending on other gear pieces. Rings can also have physical attack damage leeched as mana, which can be taken instead of having it on a jewel. Here are some search examples for rings: Life and resistance focused:http://poe.trade/search/akuwokaigiiwoy Life and damage focused:http://poe.trade/search/ubogarariokogo Life, resistances, mana leech and damage balance: http://poe.trade/search/gebazyoharitoa Kaom's Way (prophecy upgraded version of Kaom's Sign) can be swapped in for the trap phase if resistances are not an issue. It provides another endurance charges, as well as additional life regeneration per endurance charge. Jewels One jewel that has physical attack damage leeched as mana is required for this build to be able to drop a mana flask. It is important to know that the mana regeneration is not enough to keep spamming whirling blades so attacking 1 mob every now and then will leech our mana back with the jewel. Here is a budget search for the mana leech jewel (having %increased maximum life is usually too expensive): Rare jewel:http://poe.trade/search/etasinahunokew Magic jewel(should use a regal for chance at %max life): http://poe.trade/search/etahonikanoroh The rest of the jewels should be to increase maximum life and then damage. Can either search for rare ones or buy magic jewels and use regals, depending on what is more affordable: Magic jewel search: http://poe.trade/search/ikitoatamotare Rare jewel search: http://poe.trade/search/atedugaziohaut Flasks: Flasks have been covered in the in-depth section of the guide, providing more information regarding how to roll them and when to use them. You can also check the 'My Gear' section below to see them. The following flasks are needed depending on the phases Izaro has: Divine Flask Basalt Flask Granite Flask Topaz Flask Sapphire Flask Quicksilver Flask Atziri's Promise (unique flask)
Expensive Gear Choices
I will maybe update this section more if people wish to min-max the build or invest into it more. I was satisfied with how the build performed on a budget and decided to invest into other characters instead. There are a few items that can greatly improve the damage and/or survivability of this build: * Lion's Roar * Steel Rings crafted with Contempt essences * Getting high life and strength on every piece of gear * Getting a high APS, high pDPS sword (375+) * 4 prop jewels (triple damage and life) * Getting a 6 link I do not recommend using Kaom's Heart even if Blade Flurry can have enough damage on a 4 link simply because the amount of life that it provides results in traps causing more damage compared to the regeneration we receive. As a result, an eternal life flask is required and endurance charges become even more important. If you wish to use it, I would most likely have Kaom's Way during traps to help with the trap damage.
My Gear
This is the gear that I have been using since day 2-3 of the Harbinger HC league. I haven't really invested into my character beyond this yet. FAQ Why Blade Flurry over Sunder or x skill? Personal preference is part of the reason. I enjoy BF a lot more than Sunder or Cleave or other melee skills. The other reason is that Blade Flurry allows the use of Doon in the main hand, unlike Sunder which uses the main hand to attack. I wanted to include Doon in the build as it is a fairly cheap weapon that boosts both defense and offense. What would you change if you did this in SC? Nothing. If you decide to roll this build in SC instead of a faster variant, it should be fairly cheap and tanky as it is. Fully buffing Izaro and facetanking him still requires a certain amount of health/defense, so taking away from that wouldn't work. Did you know you can not kill Kitava in act 10 and never get the Merciless resistance penalty? I learned about this a few days ago, but as this was my first character, I had to kill Kitava to get into maps and get the trials. If this is not a bug/exploit, then it makes gearing easier for everyone else that does not start the league with the lab runner. Why no video? I want to see it in action and not read. I chose to write the guide instead of making a video about it due to several reasons: A lot of information (that not everyone wants to hear) Lack of experience in video editing Easier to just search for certain things than skip through a video (ctrl+f for the win) I wanted to make sure that I provide as much information as possible in a clean format That being said, I will record a shorter uber labyrinth day and upload it so you can check the playstyle and see how it performs. Meanwhile, I am often found streaming so you can check either VODs or the live action and ask me questions there! Have more questions? Drop by my stream. Special thanks To Captain, Baarn, Worldss, Twisted, Ben and Ruz for reading the guide before it was posted. To Grimjacked for providing some useful insight into questions that people might have. To Zizaran for playing the build and enjoying it. And last, but not least, to everyone for having patience while I was writing the guide! Thank you for reading! Last edited by Kisaryn on Nov 1, 2018, 8:37:22 AM Last bumped on Oct 20, 2018, 3:18:24 PM
| |
|
Keep in mind that releasing Blade Flurry at 6 stacks against reflect can hurt once DPS goes over 100k, especially if defenses are not up.
lul lul lul lul lul Great post rip ziz | |
|
10/10 best build guide, Ziz dying to reflect must mean its a good build to play and easy not to die on it
|

|
|
E Q J U G G
memes coming to an end, someone had to do thiss | |
|
R E S E R V E D
| |
|
going to try this build when I re roll on Hc
Only a dumbass pays for a F2P game.
| |
|
Are there any lab tips or tricks we should know? Like where to find the dark shrines, which chests are worth going after.
add this http://i.imgur.com/3mPqFBR.jpg Last edited by grimjacked on Aug 29, 2017, 11:39:34 PM
|

|
|
Looks pretty interesting
| |
|
When does this build respec into kinetic blast?
| |
|
Thank you very much for taking the time to make this guide!
I was actually in the process of leveling an EQ Jug for labbing but I don't really enjoy how earthquake feels. I love sunder and leveling has been a dream with it. I've always wanted to try out Blade Flurry so I look forward to that. I know you said that this build isn't made for end game mapping or guardians but I'm just curious on how this build preforms in t12+ maps? My main league starter was an ED/Con trickster and while it preforms great solo, it struggles to preform when playing with friends. Just hoping that if I invest enough currency into this character I'll see some payoff. Thank you again for making this guide and for any future responses! |

|


